Search This Blog

Tuesday, January 31, 2023

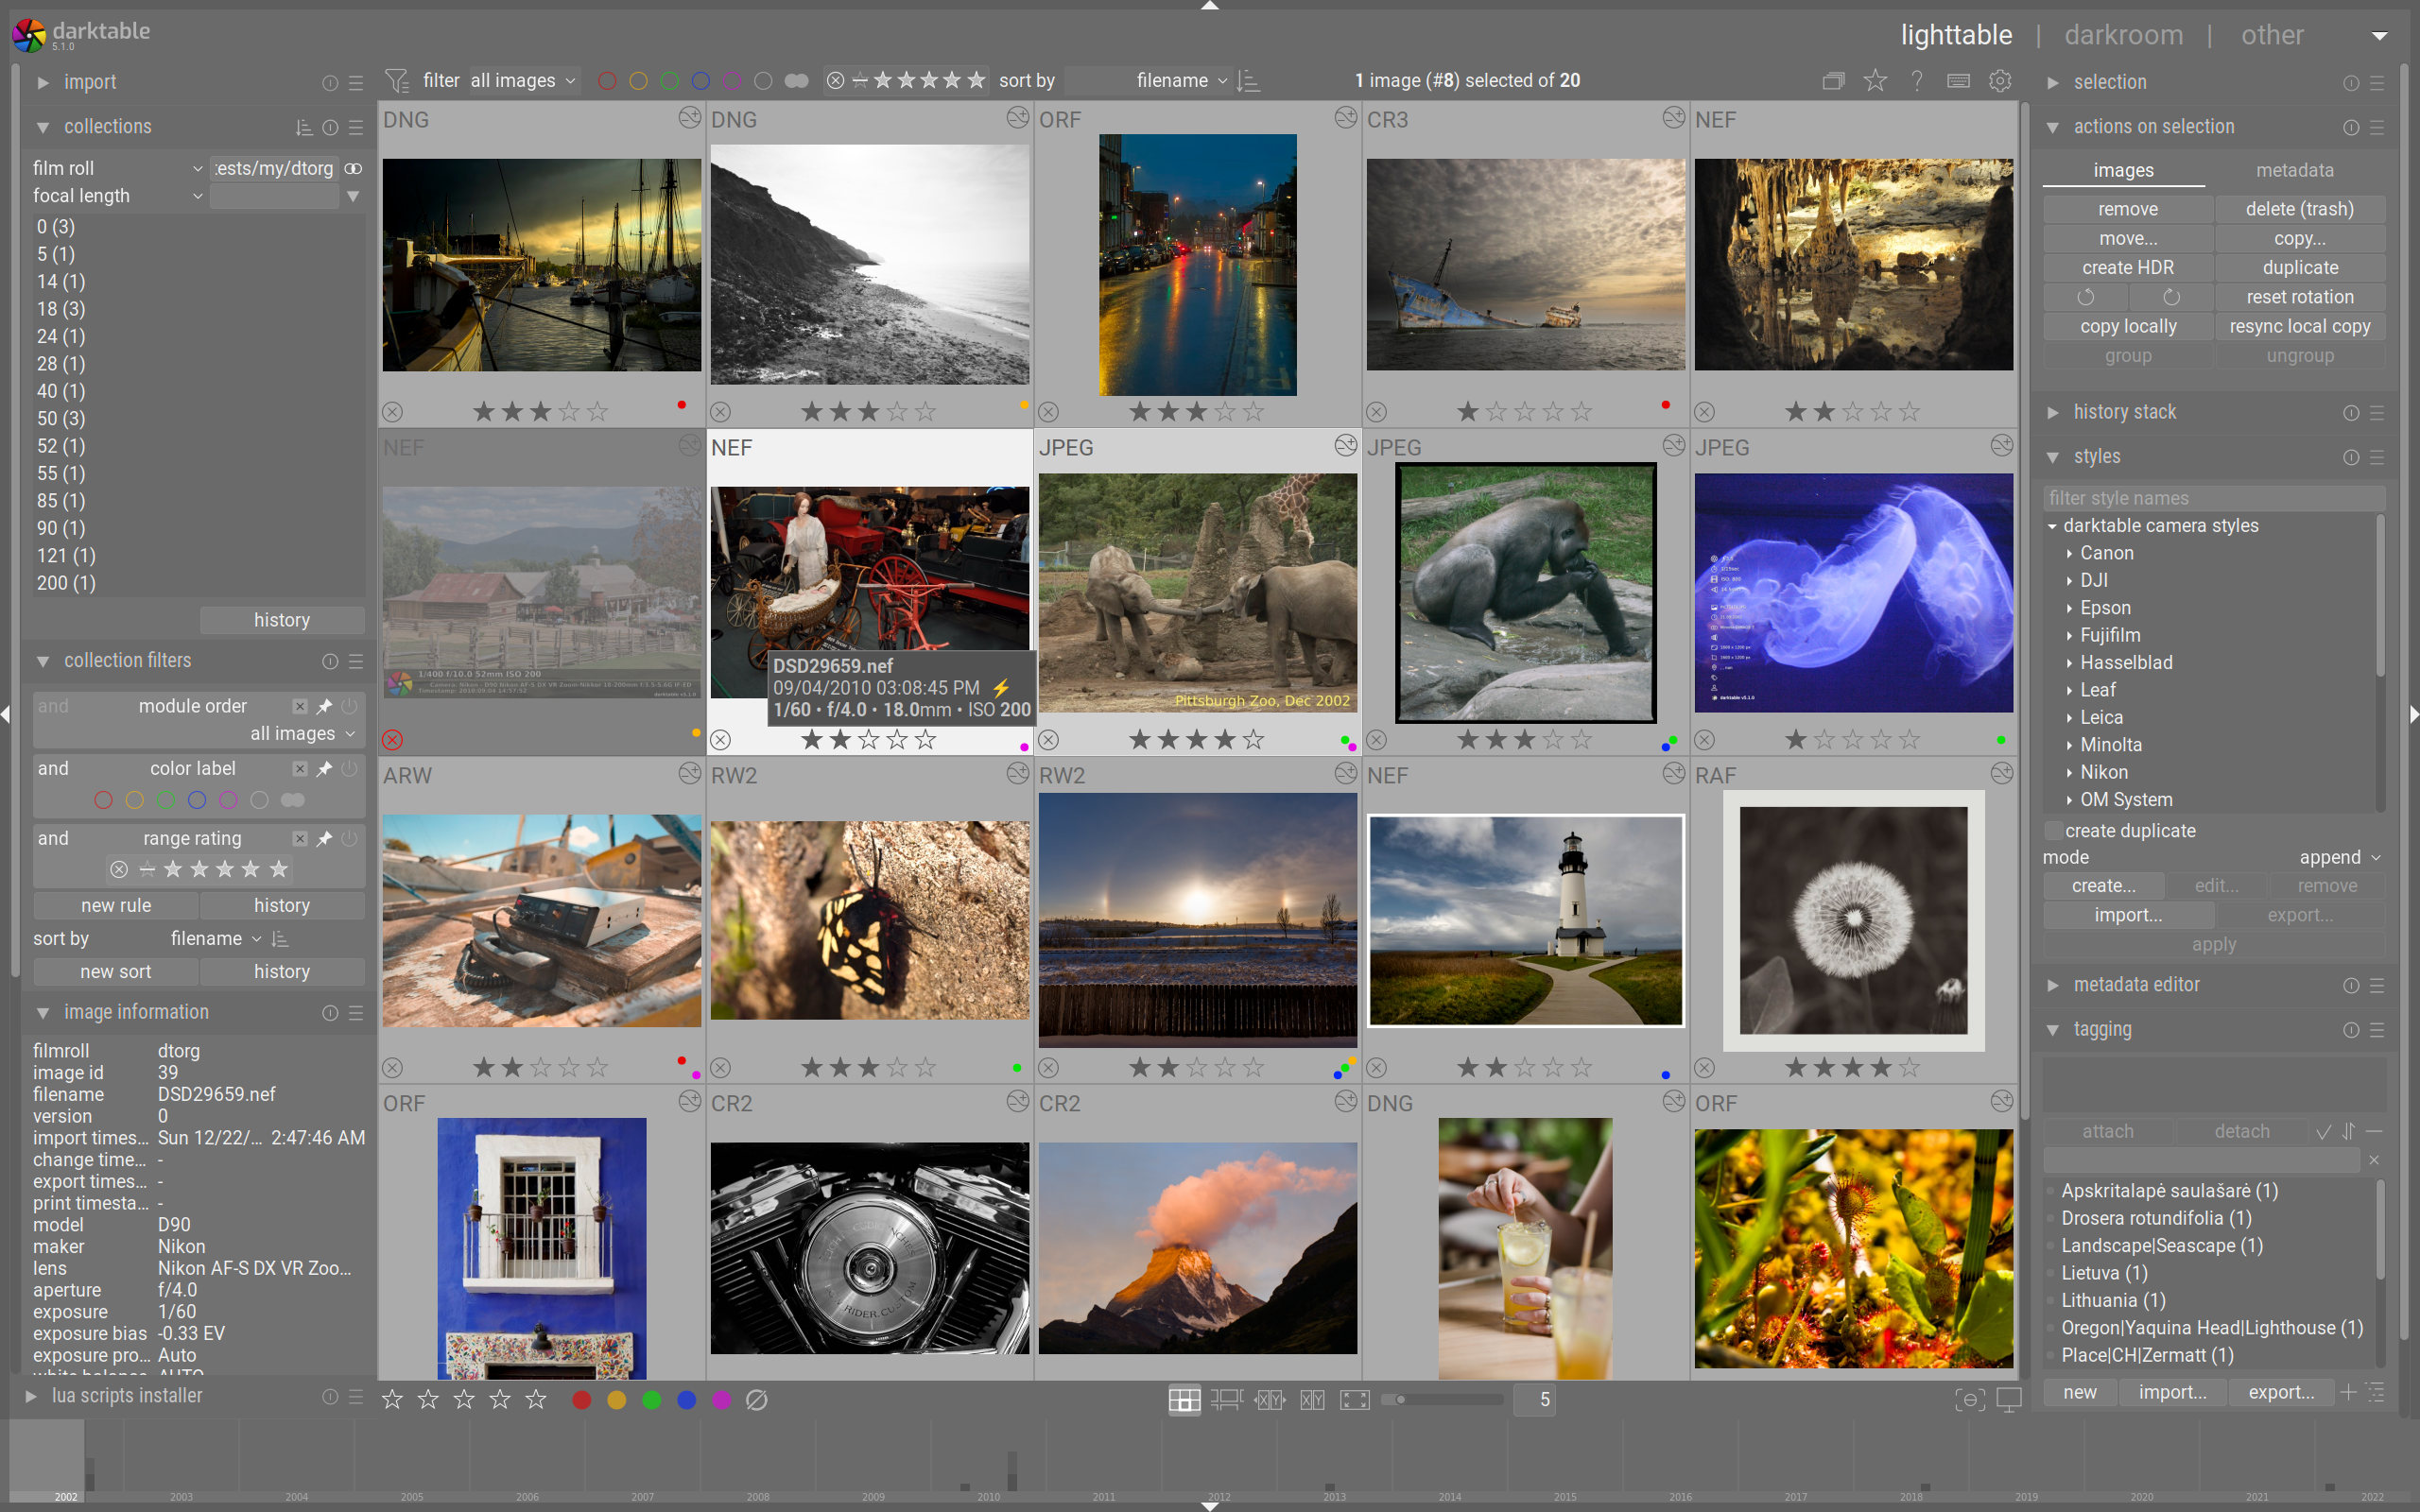
Darktable provides a satisfactory, free alternative to Adobe Lightroom Classic


    Years ago, I used to consider Adobe Lightroom (now Adobe Lightroom Classic) as Photoshop with training wheels.

    My thinking was that Photoshop was a much more powerful editor, so why waste time on Lightroom.

     But I decided to give it a try, and found it to be a versatile program, becoming my go-to for editing, as well as an excellent digital asset manager, allowing me to easily organize a catalog of more than 50,000 images.

    While it's a great program, it also comes with a high price, and with Adobe embracing the shakedown subscription plan, you pay for it monthly.

    There are "Jack Sparrow" versions out there, but there is one free, open-source program that is a rather acceptable alternative to Lightroom. In fact, I use it for my work, since we are only allowed so many software licenses and they're already in use and my bosses don't want a visit from the software police.

    I had tried earlier versions of darktable before when I needed a RAW file editor that I could install on a work computer without running afoul of the IT department. While it was a good editor, it lacked the ability to catalog, keyword, geotag and impose order on the chaos of picture files.

    But since version 4 has come out, darktable is giving Lightroom a run for its money. It has become a true DAM, allowing you to actually import photos to a specific location, add keyword tags, geotag them using a GPX tracklog, as well as edit them and export.

    I've been especially impressed with the noise-reduction algorithms, which I find give great results just by activating them. There's also an option to go in and further refine it.

    The control layout is not as intuitive as Lightroom's, but you have the option to search for the tool you are looking for.

    In addition to editing RAW files, darkroom can also handle jpg, tif and even the dreaded WebP file format.

    (That's Google's new image format that web developers are now using just because Google says it's cool, even though it's a departure from the company's motto "Don't Be Evil.")

    It's free, and if you can write code, it's open source so you can modify it if you so choose. It's available on Mac, Windows and Linux, and it can interface with GIMP, the open-source version of Photoshop.
Tuesday, January 17, 2023

Hack lets you use photo editor to get full-resolution AI colorized photos

     In an earlier post, I talked about Vertexshare's Picture Colorizer, which does a reasonably good job of turning black-and-white photos into color pictures.

    But the site has some limitation, in that you can only submit a photo that has been resized to no more than 3,000 pixels on the long edge. That can be a pain in the butt.

    However, there is a way to get a full-resolution AI-colored photo for no cost, and it will work with any photo editor that uses layers.

    Unmesh Dinda, who does some of the best Photoshop tutorials over at Piximperfect on Youtube, unveiled this hack involving Palette.fm, an AI-based photo colorization site that he said is better than Photoshop's neural filter.

    Palette gives you several options, and you can edit it by changing the word prompt for the AI.

    But it won't let you download the full resolution image that you uploaded, unless you are willing to pay either 65 cents per image or sign up for a subscription plan. The free option gives you essentially a file slightly bigger than a thumbnail.

    Dinda, in his video, demonstrates how to take that tiny picture and use it to make a full-resolution colorized photo. The secret is in layers and blending modes.

    As you'll see in his video, Dinda will add the colorized download as a layer over the original photo, and then use the transform tool to stretch it to the same size as the original, lining it up perfectly. You can turn down the opacity to make sure you're getting it straight.

    At this point, it's going to look terrible with pixelated artifacts all over the place. But, by using the color blend mode, the color patterns will be transferred to the full-resolution image, giving you a high-quality colorized picture.

    I again called the photo of Ulysses S. Grant at Cold Harbor into service to demonstrate this. This is the final result, following Dinda's steps. I did this in Photoshop, but I also tried it in GIMP, a free, open-source photo image editor that is comparable to Photoshop.   

    This is straight out of Photoshop. I would likely go back and touch up Grant's uniform and maybe his chair. But if you need or want to colorize a photo, this gives you a good starting point that can be tweaked.

    Dinda said it can also be used for correcting extreme color casts, as he shows in the video below, where he compares the results with Photoshop and MyHeritage.com.   


Tuesday, January 3, 2023

Strobist provides free training in using flash

    If one of your New Year's resolutions is to up your flash photography game, a great place to start is the Strobist website.

    The website was founded in 2006 by David Hobby, a photojournalist with The Baltimore Sun. It started when he wrote about how he lit up a photo he did of a wind-tunnel turbine.

    The site covers the full spectrum of flash photography, from simple speed lights to studio flashes, with free lessons and a gear guide. There are even some tips for DIY modifiers.


Tuesday, December 20, 2022

DIY "Paniel" lets you try out beauty dish lighting at minimal cost

    One of the virtues of do-it-yourself photo gear is that you can try out a particular lighting modifier or other equipment at little cost.

    This is especially true if you use simple materials just for the experiment with a piece of gear or a technique.

    For example, when I was making a flash modifier, I chose to use cardstock first as a "proof of concept" to see if it was something that would work for me. I have since made a second one using craft foam.

    Daniel Norton, a New York photographer and one of Adorama's regular hosts on its Youtube channel demonstrates a way to make an absolutely cheap beauty dish lighting modifier, which his model and mentee, Marisa Roper, dubbed the "Paniel."

    If you're not familiar with a beauty dish, it mounts on a flash, which then discharges into a reflector that is right in front of the flash head, bouncing it into the large dish portion of the reflector and out toward the subject. It produces a not-so-soft light that sculpts the facial features.

    It also leaves a distinct halo-like catch light in the eyes.

    Commercial dishes can run you $70 or more, depending on where you shop.

    There are plenty of Youtube tutorials showing you how to make them from woks, flower pots and other items. But if you want to just try one out to see if its something you want to invest a bit more time and money in, or you forgot to pack one and need it, the Paniel provides a low-cost option,

    You get two aluminum foil pans at either your big box store or, if you want to keep the price point really low, go to your local dollar store. One has to be a roasting pan, while the other is a pie pan or smaller. 

    The first step is measuring a hole in the back for your flash unit and cutting that out of the roasting pan. Depending on how long-lasting you want this to be, you can either use pencils or straws to hold the pie tin in place over that center hole.

    In this video, Norton demonstrates live how well this jerry-rigged device works. I like the fact that he does it live with a tethered camera because you see in real time how well it works.


    Norton demonstrates that you don't have to spend a lot to make good looking pictures. And if you like the results, you can now build a more lasting version of the light.


Tuesday, December 6, 2022

Compress time with time-lapse photos from almost any camera

    One real fun shot is the time lapse.

    We've all seen those videos that show people and other things moving at high speed, clock hands moving quickly or or a storm front come through like an express train with no brakes.

    Those are done through time-lapse photography, where a picture is taken at intervals and then assembled together into a video. It's one of those things that allows us to see things we usually can't see because they take a long time.

    And while there are fancy cameras that can be used to take them, it's also possible to use the kit you've already got to make a decent photo.

    First, if you use a cellphone, you might already be set, or at least one visit from the app store away from producing time lapses.

    Apple's iPhones, going back to at least iPhone 5, have a time-lapse option on the camera. You just put the phone on a tripod or other secure holder, push the button to start and then let it run until you're ready and it the button again.

    The phone will convert the series of pictures it has taken into a video. Depending on the length of time you ran the time lapse, the program will cut out frames in order to keep the video to the length predetermined by Apple.

    If you use an Android, you're out of luck with your camera fresh out of the box, but there are multiple apps on the Google Play store that will allow you to do a time lapse. Just read the reader reviews carefully to see which one will work best for you. Some may produce choppy video as it assembles a string of still photos together into a video.

    If you are using a digital camera, there are still ways to do it.

    Some cameras, such as Pentax, will give you the option to do a QuickTime movie, but I've found that it was a bit too jerky for my tastes.

    It should go without saying, but to cover myself, mount the camera on a tripod. There's no way you're doing this hand-held.

    Another way to do it is to take a series of photographs and use them as frames in a video.

    To do this, you might need an intervalometer, which allows you to have your camera take photos in a particular interval. Pentax actually has one built into its camera, but there are apps where you can use your phone as the trigger, or you can invest in a dedicated device.

    Another way to get a series of photos is to use a cable release and, if your camera permits, put it into a drive mode and just lock down the shutter button and let the drive do its work.

    In these situations, you need to figure out how long you want your video to be and the frame rate, which will tell you how many pictures to take.

    You also want to set your aperture and shutter speed to slightly blur moving objects, which will better sell the high-speed effect.

    A few years back, I did a time lapse to highlight a busy intersection the local police identified as a traffic hazard. Working with our paper's chief photographer, we figured out how many shots were going to be needed for the video (I was contributing to a larger video) and the best time to do it.

    After figuring out the right shutter/aperture combination to get the motion, I locked those settings in while setting ISO to automatic. That would allow us to maintain a constant exposure as the sun set.

    While I'm a strong proponent of shooting RAW whenever possible, in this case jpgs were the the better option as they take up less space on the card and would not be as hard to combine for the final video.

    I shot 600 shots, one picture every three seconds for a half hour. I just dialed the time between frames and the total amount of pictures into the intervalometer and sat back with a cup of hot chocolate while the camera did its thing.

    The resulting pictures were then converted into a video, with each shot becoming a frame in the video.

    There are a couple ways to combine them. You can use a video editor or software designed specifically for assembling still images into a video. I used to use Time Lapse Assembler until the software became incompatible with my Mac's OS, but I found QuickTime offers a free way to do it.

    Open up QuickTime Player, select "Open Image Sequence" from the File menu, specify your resolution, frame rate and final video format, and the software does the rest.

    Here's that traffic sequence I did, processed through QuickTime.