Search This Blog

Showing posts with label Lighting. Show all posts

Tuesday, February 28, 2023

DIY snoot delivers light to right where it's needed

    Electronic flashes are easily one of the great innovations in photography, making it easier to get indoor photos.

    But when you're ready to get past the harsh light coming from either on top of the camera or alongside it, there are a variety of ways to modify the light, either commercially or homemade, and go for a more artistic look.

    In previous posts, we've talked about softboxes and reflectors take the edge off the flash's harsh light, and an adapter for macrophotography.

    Today's installment deals with snoots, which turn the flash into a spotlight, putting a small relatively tight spot of light on a subject.

    While a grid, which we talked about building earlier, may seem to do the same thing, there's a difference. The grid's honeycomb pattern not only directs the light into a tighter area, it also feathers the edges so it's not so harsh.

    A snoot instead throws a sharply defined beam of light at its target. This can be good for creating a hairlight to separate your subject from a background or to create a shaft of light effect.

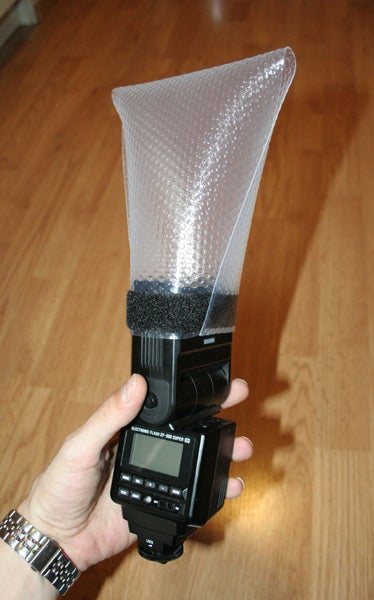
    My DIY snoot consists of postal box cardboard formed around the flash head, creating a tube that funnels the light forward. While some have used Pringles potato chip cans for this purpose, I found it was too narrow to put my flash head in straight on, and the bouncing in the macro tube was not effective for long distance.

        Now, to see how it works

    First, a photo with the unmodified flash, to serve as the baseline.

    With our DIY grid. See how it's a narrower beam but just fades off on the edges.

    The snoot produces a tight, harsh light. If you wanted to create the look of a shaft of light, this would be an effective tool for the job.

Tuesday, February 14, 2023

Work flashlight can aid aiming speedlights in studio settings

     When you start using off-camera flashes, usually the first lights you're going to use are your speed lights.

    One drawback with they have, compared to their larger, brighter studio cousins, is the lack of a modeling light.

    A modeling light is a small lamp, incandescent or now, LED, that shows the photographer where the light from the flash will fall, especially if it's used with a modifier. You likely saw these if you ever went to a photo studio for a portrait, or when you had photos taken at school; it's that glow you see coming from the umbrellas or softboxes before the picture's taken.

    Modeling lights are helpful if you're trying to set up a Rembrandt lighting (that's when one side of the face is illuminated more than the other side, but you have that triangle of light on the cheek on the darker side), or trying to adjust a rim light.

    You can still work without a modeling light, but that can involve quite a bit of trial and error, which might not go over well with some subjects who might question your competence behind the camera.

    But there is a way to at least get a similar effect and get your lighting within the ballpark, and just require a little bit of fine-tuning.

    Remember the flashlights I mentioned earlier as a night-photography light? You can use that as a makeshift modeling light.

    And it will only set you back 99 cents at Harbor Freight, unless you catch one of their free giveaways.

    For this to work, you make sure the main light is on, and center it over your flash head, or the center of your softbox. This will show you where the light is generally falling, and you can adjust the light's position as needed.

    It won't be as WYSIWYG* as a modeling light, but it will give you the general idea of where your light is going to go, and that should mean fewer adjustments when you start shooting.


    *What you see is what you get. It's a term first coined when word processors began to show you how your document would actually look with the chosen fonts and text styles.

Tuesday, January 3, 2023

Strobist provides free training in using flash

    If one of your New Year's resolutions is to up your flash photography game, a great place to start is the Strobist website.

    The website was founded in 2006 by David Hobby, a photojournalist with The Baltimore Sun. It started when he wrote about how he lit up a photo he did of a wind-tunnel turbine.

    The site covers the full spectrum of flash photography, from simple speed lights to studio flashes, with free lessons and a gear guide. There are even some tips for DIY modifiers.


Tuesday, December 20, 2022

DIY "Paniel" lets you try out beauty dish lighting at minimal cost

    One of the virtues of do-it-yourself photo gear is that you can try out a particular lighting modifier or other equipment at little cost.

    This is especially true if you use simple materials just for the experiment with a piece of gear or a technique.

    For example, when I was making a flash modifier, I chose to use cardstock first as a "proof of concept" to see if it was something that would work for me. I have since made a second one using craft foam.

    Daniel Norton, a New York photographer and one of Adorama's regular hosts on its Youtube channel demonstrates a way to make an absolutely cheap beauty dish lighting modifier, which his model and mentee, Marisa Roper, dubbed the "Paniel."

    If you're not familiar with a beauty dish, it mounts on a flash, which then discharges into a reflector that is right in front of the flash head, bouncing it into the large dish portion of the reflector and out toward the subject. It produces a not-so-soft light that sculpts the facial features.

    It also leaves a distinct halo-like catch light in the eyes.

    Commercial dishes can run you $70 or more, depending on where you shop.

    There are plenty of Youtube tutorials showing you how to make them from woks, flower pots and other items. But if you want to just try one out to see if its something you want to invest a bit more time and money in, or you forgot to pack one and need it, the Paniel provides a low-cost option,

    You get two aluminum foil pans at either your big box store or, if you want to keep the price point really low, go to your local dollar store. One has to be a roasting pan, while the other is a pie pan or smaller. 

    The first step is measuring a hole in the back for your flash unit and cutting that out of the roasting pan. Depending on how long-lasting you want this to be, you can either use pencils or straws to hold the pie tin in place over that center hole.

    In this video, Norton demonstrates live how well this jerry-rigged device works. I like the fact that he does it live with a tethered camera because you see in real time how well it works.


    Norton demonstrates that you don't have to spend a lot to make good looking pictures. And if you like the results, you can now build a more lasting version of the light.


Tuesday, October 25, 2022

How to bring out the inner glow of your jack-o-lantern


Photo by Skyler Sawyer on Unsplash

     Halloween is fast approaching, and one of the traditional decorations is the jack-o-lantern.

    Some range from the minimalist designs with a mouth, nose and eyes cut away from the gourd, while others are more elaborate pictures. The best way to photograph them is with the primary light source being the one that is inside the pumpkin. And that means adjusting your camera to only capture that light.

    Over on Instructables, user jenleigh offers some basic tips for doing it. She suggested making sure there is a fairly strong light inside the pumpkin, either a pumpkin light or a bright flashlight. I think you might get a good effect with a remotely fired flash inside the pumpkin. The best way do that would be to have the flash on the bottom and pointed at the top, illuminating the inside.

Tuesday, October 11, 2022

Pringles can offers macro flash diffusion for less than $2

    In a recent post, we discussed ways to do macrophotography if you don't have a dedicated macro lens.

    Now, lets talk about lighting those extreme close-ups.

    While you can use continuous light, such as a desk lamp, you might not have that option if you are shooting outdoors, or if the lights you have won't permit a fast-enough shutter speed to avoid blurring.

    One of the best ways to do that is through camera flashes, but you are going to need to diffuse the light to make it flattering, as well as work well up close.

    One low-budget way to do it is to use a Pringles potato-chip can as a snoot/diffuser for the pictures.

    A Pringles can is particularly suited for this task because the inside of the canister is silver colored, making it more reflective. It also has a clear cap, into which you can put diffusing material to soften the light.

    Plus, Pringles don't leave the same greasy residue behind like traditional potato chips.

    There are multiple tutorials online for how to make this rig, but here's how I made mine.

    First, I picked up some Pringles at the local Walmart for just under $2, and had a nice snack at work for a couple days.

    Then, after sweeping all the chip crumbs out of the tube, I cut out a hole in the side about a quarter-inch from the bottom that was the same dimension as the flash head. While some people cut away the cardboard completely, I chose to leave it as two flaps to better grip the flash head.

    While some people will mount the flash in the back, I found the side mount is better, as the head is straight up, and you can angle it to light the subject in front of the lens. The other way requires sculpting the tube into a particular shape, which only works if you are going to use one particular lens for your macro shoots. I personally prefer to keep my options open.

    For my diffusion panel, I put a circle of copy paper in the cap. After making sure it worked, I then put black duct tape on the outside to give it a relatively professional look.

    This is how the rig looks when on the flash and camera, before being covered in duct tape. 

       (Note the guide number of the side of the flash, a tip from an earlier post on flash photography.)
     
     Here's a photo taken with ambient light in the room, with no flash as the control.


    And here's one with the diffuser.

    For this shot, I was using through-the-lens metering for the flash, but you can use a manual flash, but it might take a bit of trial and error.

Tuesday, August 30, 2022

PVC stand attachment provides extra "hands" for using poster board reflectors

    This post is a bit of a two-for-one deal. Two DIY projects in one post.

    The first one is a DIY reflector to bounce light on to your subject. You can use these indoors or out.

   There are expensive models, but a couple of photographers, including Joe Edelman and Daniel Norton, recommend using white poster boards. Norton calls the ones he uses "Brooklyn Reflectors." The boards are inexpensive — you can get them for $1.25 a piece at the so-called dollar stores, or your usual big-box store.

    With it being back-to-school, you may be able to get them on sale.

    Here's Edelman's demonstration with one.


You can use the reflector with a voice-activated lightstand — also known as an assistant — but if you're shooting alone, it could get tricky trying to take the picture and hold the reflector yourself.

    Edelman proposes building a PVC holder for the reflector that lets you adjust it and put it on a lightstand. This allows you to use it hands free, and the rig can also hold flags (the light-blocking variety, not the state or national emblems) and Gobos, which go between a light source and a subject to create a pattern of light, say simulating light coming through a Venetian blind.

    Edleman's plans are in this video, although I would probably also use a joint to mount it to a PVC lightstand.


Tuesday, August 16, 2022

Manage where your flash goes for about $1

     Light, obviously, is an essential part of photography, which means "light writing" in Greek.

    While we spend a lot of time and energy on putting light into a photo, there are times when you want to keep light out, or remove it.

    For example, when you want to keep light from your light source, be it a flash or continuous light, from spilling over onto the background or into your lens.

    (Unless you're J.J. Abrams, then knock yourself out with that lens flare.) 

    One way to do that is with a flag, basically a black device that you can put on or next to a light to keep it from spilling onto a background or a wall and scattering back into the photo.

    You can buy flags in a variety of sizes, some requiring stands to use. But you can make your own for a fraction of the price, using velcro and craft foam.

    Youtuber Spyros Heniadis demonstrates how much of a difference a 6-inch-by-9-inch piece of foam attached to a flash head can make. His method allows you to vary the size of the flag and its shape to best sculpt your light. 

    With the low cost, you can make flags for all your flashes. You could also use it for continuous lights, but I would recommend doing that directly on the light only if you're using LED or CFL bulbs, as incandescent or halogen bulbs would get too hot.


Tuesday, June 7, 2022

Know your flash's guide number at a glance

    If you aren't using your flash in automatic mode, you're going to need to figure out things like aperture and power levels on your own.

    But first you need to know how much power your flash has, and for that you need the guide number.

    The guide number is a figure that shows you the flash's power, based on a formual of distance times aperture. The higher the number, the farther away a subject can be and still illuminated adequately.

    In the old days, we would have to do some math to figure out the aperture setting for a subject at a particular distance, or use a table on the back of the flash that would tell you what settings to use for a subject at varying distances.

   Today, if you want to use your flash manually, there are calculators you can use on your phone, such as the one in the Photographer's Companion, where you input a few variables, such as the guide number, flash power and either aperture or distance, and it will do the rest of the work to find the right camera settings.

   If you don't know the flash number, you can look it up in the flash manual, which you can also upload to your phone so you'll have it at all times.

    If you have just one flash, remembering the guide number is simple enough. But what if you use more than one flash, and they have different guide numbers.

    What I have done is made a label showing the guide number that I affix to the side of each flash unit, so I can tell with a quick glance what the guide number is when figuring either how far away to put the flash, or what aperture I'm going to need to get the right look.

    When I made my labels, I used a word processing program and set it for an inverted output, with white numbers on a black background, making the label look inconspicuous, even more than the old tables that used to be on flash units.


Tuesday, May 24, 2022

Turn household items into lighting modifiers

    Daniel Norton one of the photographers who appears regularly on Adorama's Youtube channel did a video during the COVID-19 lockdown demonstrating how to turn things around the house into lighting modifers.

    Among the items he uses to modify his single speed light are tin foil and poster board reflectors, as well as wine bottles and honey to create different effects.

    While he was doing it with a small figure on his desktop, the techniques could work for portraits.


Tuesday, May 10, 2022

DIY flash grid lets you put subject in spotlight

     We've talked earlier about softboxes, which allow you to make your light bigger and softer, which can be a flattering look.

    But there are times when you want the light to be tighter. For example, if you want to just do a rim light, you don't want to completely light up the subject.

    This is where grids come in. The grid creates a narrow spot of light with feathered edges so the light falls off. It does this by forcing the light through a grid, channeling it in one direction and reducing spread.

    Photographers use grids on all kinds of flashes, with some covering large softboxes, while others fit over basic speed lights. However, the smallest of those are $7 at some retailers.

    If you are looking to make your own, or make a custom set, you can do it for a few cents a piece.

    There's a couple videos out on Youtube showing how to make them, but the one I like is done by Spyros Heniadis. Instead of using straws to form the grid as some suggest, he recommends using corrugated plastic, also known as coroplast. What I like about it is you just assemble strips of material to a size that would cover your flash head. No need to glue individual straws together, assuming you can find black straws where you live.

    You can pick up coroplast at craft stores or sign shops, or just grab some campaign signs after the election, but you want to make sure the material is black. Other colors will cause a color cast, and white will spread the light out, defeating the entire reason you're doing this in the first place.


    One thing I did different was instead of using craft foam for the body of the grid, I used cardboard from postal mailing boxes that I used to make the softboxes, and then wrapped it in black duct tape to both hold it together and give it a more professional look.

    Here's a shot I took without the grid.
    

    And here's one with the grid.


    I used a 1-inch long grid, but you can use different lengths to either widen or narrow the field. With this method you can make a variety of grids for different situations.

Tuesday, March 15, 2022

Get better portraits with DIY clamshell lighting setup

     One way to get good portrait lighting is to use "clamshell" lighting, and there's a way to do it without without triggering Gear Acquisition Syndrome.

    It's a lighting technique that can work with all sorts of portraits. What it does is uses a light source from above and one from below to light the subject. It's a relatively soft light and does not create harsh shadows.

    But you don't need an elaborate studio setup to pull it off, as Alastair Currill, an English photographer, demonstrates in this Youtube video. You can do it with one flash, a modifer to soften that light and a reflector to bounce the light back up to the subject.


    You can use a speedlight for the flash, and if you don't have an umbrella, you can use the DIY softbox and light stand we talked about earlier. As for the bottom light, you can use a table with a white cover or a foam board from the local big-box or dollar store.

    He also has another video demonstrating the principles behind clamshell lighting, albeit using more expensive studio gear.


Tuesday, January 18, 2022

Recycle film canister as DSLR pop-up flash diffuser.

    While the pop-up flash on many DSLRs are a way to get some extra light in a picture, it's not the best.

    These flashes, which take up the top part of the pentaprism, are typically tiny and work best at the range of 12 feet. It's also a hard light, which means a subject is going to have hard shadows around it and be harshly lit.

    I only use mine in situations where there's no other way to get the picture or as a wireless trigger for other flashes.

    But over on Instructables, user deth2all presents a way to take some of the harsh edge off the pop-up's light, and even add some color to it as well. And if you used to do a lot of film shooting with Fujifilm, or know someone who did, you can get the main part you're going to need.

   (deth2all/cc-by-sa)

    The diffuser consists of the plastic film canister that protected the film cartridge before use and later when sitting in your gadget bag. It has to be Fujifilm, which used a white, translucent plastic to make its cases; Kodak's canisters are all black.

    The project involves cutting away part of the canister's side wall, so it can fit over the flash head. He also cuts a slot in the side of the cap, which is glued back in. That slot is used to insert a colored gel for various effects, as well as balancing the flash with another light source.

    (He recommends getting sample packs of gels from art-supply stores, but those have since stopped providing them. You can make some of your own by cutting up colored plastic report covers.)

    The results he posted on the site show some reasonably good results. If you're looking to improve your flash photography but aren't ready to make the leap to speed lights, this is a good option.

Tuesday, December 7, 2021

DIY hack lets you get Gary Fong-like lighting from your speed light

    Speed lights, or flashes as we used to call them, are great for getting lighting where it's needed.

    But, in their basic, unmodified state, they produce a light that's pretty hard and not flattering. 

    So far, I've shown how you can make bounce cards and soft boxes that will take the edge off that harsh light and make your subject look better.

    Another device for doing this is the Lightsphere developed by Gary Fong. It's essentially a translucent plastic-and-silicone sphere that attaches to your flash and provides a diffused light for your subject.

    I remember seeing one in a picture of a press scrum at a Mitt Romney campaign event and joking that it looks like Mystery Science Theatre 3000's Tom Servo is a Romney supporter. 

    The concept is actually quite good, especially when you're in places where there isn't a white ceiling and/or wall to bounce a flash.

    But it comes with a $70 price tag, which can be a "hard nope" for some people.

    However, there's a way to get the same effect at a fraction of the price, and all it requires is a trip to the local department store for a few odds and ends. Specifically, you'll need a plastic drawer/shelf liner (not the self-adhesive kind) and velcro tape.

    As shown on Instructables, you cut a 15-by-6-inch piece out of the shelf liner, apply the velcro on the narrow ends of the piece on opposite sides and then you wrap it around your flash.

DIY Gary Fong Lightsphere

    It should look like this when you're done. (Photo credit: Arthur Gajewski, cc-by-sa)

    You'll notice it appears to be sideways on the flash, but that allows you to effectively use it whether you're holding the camera in a landscape or portrait orientation.

     So, how does it work?

    Allen Mowery did a Youtube video demonstrating. Check it out. I think I'll be adding one to my ever cramped camera bag.


Tuesday, November 9, 2021

How to turn a dishpan and cake dish into a monster DIY studio light

    If you are looking for a way to really light up what you are shooting, you might want to take a trip to the kitchen aisle of the local store.

    Griffin Hammond, of Indy Mogul fame, did this video showing his plans for a DIY studio light that had the output of the equivalent of 13 60-watt incandescent light bulbs. While the video is about nine years old, his idea is still a good one.

    His light uses a deep plastic dishpan for a reflector around the lights, which are in socket splitters in four light sockets, with the cake pan serving as the electrical box for the rig.

    Griffin's rig uses eight 100-watt-equivalent CFL bulbs, but LED bulbs should work just as well. He estimated the cost of the rig at $85, but it's not a bad price if you compare it to a commercial rig with similar output.

    You can also lower that price point by purchasing some of the supplies at your local dollar store instead of the big box stores. You'll probably still need to go to the hardware store for the lighting rigs.

    Griffin's rig requires some knowledge of electrical wiring, and his video doesn't clearly show the wiring pattern. If you'd rather not bother with making your own electrical circuits, some of the commenters on the video suggested using a power strip with plug-in light sockets, simplifying that part of the project.

    I would probably paint the outside of the pan black, giving it a better appearance as well as minimizing light spill.

    From his video, it looks like a great option if you're shooting video or prefer to use continuous lighting in your photo studio.


Tuesday, October 12, 2021

Get the U.S. Post Office to deliver softer light from your flash unit

    In our last post, we talked about using a modifier to bounce your flash and soften its light.

    If you're using your flash in an off-camera studio setup, you might want to use something a bit more heavy duty to soften that light from the flash.

    A flash is what's known as a "hard" light. It's a bright, small, directional light source that can produce a harsh light and crisp shadows, even if you use it off the camera.

    A softbox increases the size of the light source, which softens the light, especially when combined with a diffuser in the front. It creates a more pleasing effect, especially when you're doing portrait work.

    There are commercial options for speedlight-sized softboxes, but they start at about $17, and go up from there.

    But for the same price, you could make several soft boxes, varying the sizes based on the size of your flash and how much diffusion you want.


    This particular design is made from duct tape, aluminum foil, either wax paper or cooking parchment, and a post office shipping box.

    While this softbox is not collapsible, it is more for either in studio or if you're taking it to a staged location shot.

    While any cardboard will do to make the box, I chose to use a priority mail box for my build, inspired by my maker son who uses those boxes to make carrying cases for books. I found it's a good material for this type of project:

    • It is a more sturdy cardboard than you find with some other boxes.
    • The boxes are free at the post office. (You only pay when you actually ship something in it.)

    I figured out the size I wanted for the diffuser at the end, and then measured out on the cardboard from that width, angling the size lines down to the aperture where the flash unit goes, and cut the pieces.

 
    The next step is to put a reflective material on the inside part of the box, to increase the flash's power, especially since the light is going to be diffused. You can paint it white, but I chose to use aluminum foil, shiny side out. I used a glue stick to attack the foil, but I think in future builds I might go with a spray adhesive.


    I found that duct tape was the best way to join the sides together. I used black to give it a more finished look. For the diffuser panel, I used wax paper, but I also did a later one with cooking parchment, which has a greater diffusion but costs you one stop in light.
 
    It just slips over the front of the flash, and at this size works best when the flash is mounted on either a light stand or  a tripod, although you can scale it down to fit on a camera-mounted flash.

    So, what do the pictures look like? I thought you'd never ask.

    First, here's without the box.

    As you can see, the light appears harsh, and the shadow has a crisp appearance.

    Now, with the first box I built, which is about a 10x10.

    You can see the softening in the shadows, where there's now an actual penumbra rather than a hard edge.

    Here's a smaller version I made.

    This one didn't soften the light as much, as it was a smaller box, but it's also about 2 meters from the subject.

    Finally, I made a larger, shallower box, and used parchment instead of wax paper.


    This one produced a softer light, but I also had to increase the flash power by one stop to get the proper exposure with the parchment.


Tuesday, September 28, 2021

DIY rig allows for bounced flash even when there's no ceiling to aim it.


    One of the easier ways to improve your flash photography is to bounce it off the ceiling or a wall.

    As long as the surface is white, or close to white as possible, it will soften the light and give a more pleasing appearance to the subject.

    There are just a couple problems with it, though.

    First, just bouncing off the ceiling by itself will cause shadows around the eyes and under the nose. That's because the light is only coming from above. Years ago, I got around that problem with a double-headed flash, where a smaller flash filled in the shadow areas, creating a great even light.

    Second, you need a ceiling, or at least one that's not too far away. Trying to bounce a flash off the ceiling of a Gothic cathedral or indoor stadium is not going to work as well as a standard-height ceiling.

    The solution to the problem is to use a bounce card that gives the flash something to bounce off, both filling in the shadows and allowing for a softer light in places where a ceiling bounce is clearly not practical.

    Most speedlights today are equipped to a small plastic card you can slide out that reflects some light forward while the main flash bounces off the ceiling, balancing the light. But that does not quite address the problem if you're shooting outdoors.

    There's a variety of flash modifiers out there that will allow you to bounce the flash forward, creating a softer light than a direct flash while avoiding the shadows from just an overhead lighting.

    The one I use is one I found on Pieroway.com. Unfortunately, the site has since been suspended, but fortunately it is still available on Archive.org's Wayback Machine. The site has PDFs that you can print out with the pattern for the bounce card, with the option to print one with a plain black back or one with the logos for Canon, Nikon or Sony.

    One of the things I like with this design is that it goes over the face of the flash, giving the light something to bounce off of. Other cards allow the flash to go straight out to the ceiling, which is fine if you have a ceiling nearby.

    While the site recommends printing it on card stock and making the necessary folds, I found that using two sheets of craft foam — one black and one white — works better, as it's more durable, the black layer prevents light spillage and it can be folded if you score the fold lines with an X-Acto knife.

    The site recommends attaching it with a rubber band, which I did when I used a cardstock version as a proof of concept. For the final, I used Velcro fasteners to attach to the flash unit.

    Here's what it looks like on my flash:

    But how does it work?

    Here's a photo with the flash directly on the subject, in this case a plush Opus from "Bloom County." (The following pictures only have lens corrections, color balance and sharpening applied.)

    Bouncing off ceiling.


    The flash's built-in flash card.

    The Pieroway modifier.


    What do you think?

Tuesday, August 31, 2021

DIY fluorescent LED bulbs provide customizable lighting alternatives for photos, video


    Along with clamp lights, another option for continuous lighting are LED fluorescent tubes.

    Adam from Droi Media did a couple video tutorials in 2019 showing how to make your own light tubes, as well as a mount and dimmer for them. He estimates the costs for the lights at less than $25 a foot.

    Many of you are probably thinking that sounds pretty stiff since you can get a 4-foot LED fluorescent tube for about $63 at a warehouse hardware store. And you'd be right, except for two things: 1. That's just the tube and not the mount or the way to power the light; and 2. You have to buy a 4-foot light.

    Adam's plan allows you to customize the size of the light to fit your cases, and they don't require all the other major hardware you need to power them.

    Basically his design involves wrapping LED strip lights around a wooden dowel, attaching wires for the power supply and inserting it in a frosted tube secured by screws through the end caps and hooked up to a power supply. The hardest skill in the whole thing appears to be soldering wire.

    He also shows how to combine them on a mount with a dimmer switch. It's a great addition for your video or studio photography kit, and being LED, which can also run off batteries, used in the field as well.


Tuesday, August 17, 2021

PVC lightstands can support flash units with DIY adapter

    As promised, here's how to mount a flash unit on your PVC light stand.

    Everybody is familiar with flash units, especially on-camera flash. Some people started out with the built-in flash, but the first major upgrade is going with a speed light on the hot shoe.

    But if you want to take your flash photography to the next level, you need to get the flash off the camera, allowing you to get better lighting angles than if it's attached to the top of your camera, or on a bracket to the side.

    We won't get into how to trigger the flash, as the DIY options involve some knowledge of electronics and there are options available such as wireless transmitters or using our camera's on-board flash as a "master" to trigger the "subordinate" flashes.

    But the question is how to set the flash up away from the camera. Most speed lights nowadays come with a small cold-shoe base you can attach to the bottom of the flash. This base lets you set it on a table or shelf, but that doesn't help much when there's nothing to sit it on.

    The flash makers recognize that, and these feet have a 1/4x20 hole in the bottom to attach it to a tripod. That's a good alternative, but suppose you need the tripod for a camera, or you don't have the room to set up one or more tripods (they do take up quite a bit of real estate)?

    PVC light stands, particularly the one I built based on Scott Eggelston's (The Frugal Filmmaker) plan, take up one square foot of floor space.

    Using Scott's plan for hacking a worklight, I got a set of four 3/4" PVC end caps to make four flash mounts. While Scott just put a bolt through the cap to attach to the work light, a flash is different, since it would also need to swivel and tilt.

    I found a set of fairly heavy duty ball heads on eBay (I had asked Scott if a ball head he had used in a different project would work for a speed light, but he told me to get something with a greater weight rating.) that could hold a DSLR with lens if needed.

    I attached the head to 1/4x20 bolt through the cap, giving me a mount that can slip over the 3/4" pipe on the lightstand.


    The ball head is fully adjustable and the flash stand attaches easily and securely to it.


Tuesday, August 3, 2021

Mount your clamp light on a PVC lightstand without the clamp

    In the last post, I talked about how to double the output of a clamp light by using a two-bulb adapter.

    This time, we're going to talk about a better way to mount the lights than with the clamp.

    While the clamp offers a certain level of versatility, there are some drawbacks, especially if you're using the PVC lightstands I highlighted a couple years ago. The clamps sometimes don't grip the pipe just right and may come off at an inopportune moment, or they might throw off the balance of your stand.

    Also, if you're shooting in someone else's home, they may not want you attaching your clamp to their furniture and possibly scuffing it up. (Sometimes the rubber on the clamps wears out.)

    But there's a solution if you use the PVC light stand, as demonstrated by Ryan Connolly over at Film Riot. What Ryan did was replace the clamp with a pipe connector, allowing you to directly connect the light to the stand.

    What you need is a 3/4-inch pipe connector, a bolt, wingnut and a couple nuts if needed. Here's the basic assembly for the mount (before the light is attached).


    First, remove the clamp and get a bolt that will fit the hole that was used by the tiny bolt that held the clamp on. I wouldn't throw away the clamp, as you might want to use it if you're in a situation where you can't use a lightstand.

    Then, drill a hole through both sides of the connector to thread the bolt through. In my case, I needed to put a couple extra nuts on to ensure the clamp mount didn't come apart. On the other side, put the wingnut, as this will let you control the vertical angle of the light.

    This is the finished product, attached to a stand.

    Scott Eggleston, of the The Frugal Filmmaker, offered a similar solution for mounting shop lights on a PVC stand, except using end caps.

    In our next post, I'll show you how to use that technique for flash units.