Search This Blog

Showing posts with label photography. Show all posts

Tuesday, May 9, 2023

We've moved

    I've moved the blog over to Wordpress.com, which gives me more flexibility, such as offering photo galleries along with the blog, as well as providing a platform that can work if I decide to turn this hobby into a side hustle.

    The new blog's at macgyverphotography.wordpress.com, and all the old posts, which will continue to be available here, are there as well.

    I look forward to seeing you there.


  Photo by HiveBoxx on Unsplash

Tuesday, April 11, 2023

Focus Chart app helps get photos, video tack sharp

    You've probably had that time when you were trying to get of the focus, either in a studio setting, or for a video standup.

    There's an app for that.

    Focus Chart, an Android app, gives you a couple high-contrast focus patterns that will be easy to lock on, either manually or with auto focus. If you're trying to do a self-portrait or a video, put the phone with the chart on a stand where you're going to stand, set focus and then move it away and step in.

    The best part is, it's free, and there's also a version for the iPhone as well.


Tuesday, March 28, 2023

Selfie sticks can take your photography down the rabbit hole, and other low places

    In our last post, we talked about using a monopod to give your camera a view from above.

    But sometimes you want to take a camera low, or into a place that's tight. A selfie-stick provides a great opportunity to get unique angles with a cellphone camera.

    Selfie sticks are good for this because they are extendable and you don't need to hit the on-screen button to trip the shutter.

    If you haven't seen one yet, a selfie stick is a device you can mount a cellphone camera on and, using either a Bluetooth trigger or a plug in the earphone port (sorry iPhone users. Blame Tim Cook), you can take a picture by pressing a button on the handle.

    The original idea for this was taking a picture with the front camera on the phone, allowing you to hold the camera farther out than your arm's length, thus getting a better-looking picture (that wide-angle lens on a cellphone's front camera is not your friend) or get more people in the shot.

    I bought one at the local dollar store because the mounting clip would also work on a tripod, but I found uses for the stick, such as doing video.

    But we discovered you can use it to get a camera either really low without having to crawl around on the grass, or use it to view under things or to look inside small spaces.

    We were raising some rabbits who decided they'd rather raise their kittens (yes, that's the correct term for baby rabbits, not bunnies) underground rather than a nesting box in their enclosure. After the litter was raised, we were going to close off the hole to ensure they didn't try to reenact The Great Escape. (They actually gnawed through chicken wire to dig the hole in the first place.)

    But before we started, one of my sons had the idea to see what it looked like inside the hole. So, I got my selfie stick out, put my old cellphone in the clip and hooked up the shutter cable, and we lowered it inside, with the "flash" set to automatic.

    As you can see, we got a decent look at the inside of the rabbit hole.

    No, we didn't find any girls named Alice down there.

    If you're going to do something like that, make sure the phone is secure on the end of the stick, even if you have to wrap a rubber band around it.


     *Let's be honest. When a cellphone uses its "flash" it's just quickly turning the LED flashlight on and off. It's not a real flash in the sense of a sudden burst of light as a capacitor discharges into a tube.)

Tuesday, March 14, 2023

Using a monopod can elevate photography to new heights

    Sometimes, the difference between a good photograph and a great photograph is a matter of perspective.

    Just getting a higher view can provide a better perspective at times. But sometimes getting that angle is more easily said than done. There may not be a place where you can climb up, or bringing in a ladder would be impractical.

    Drones offer one way to get your camera above the crowd, but they can be expensive, sometimes require licensing to use and in some places are illegal.

    But there is a way that you can get at least some altitude with your camera even in places where you can't legally deploy a drone.

    In a 2013 video, Joe Edelman suggests using a monopod to elevate your camera to get a better perspective. He suggests putting the camera on the monopod, activate the self-timer and then hoist it up and wait until the shutter trips.

    There are a few caveats. You have to use a wide-angle lens and a small aperture in order to get the greatest depth of field. And, unless you're working with someone who can monitor the camera through wired or wireless tethering, it might take a few tries to get the shot right.

    I decided to give it a try with a veterans memorial in Sunnyside, Wash. The memorial consists of tablets on a block-long plaza. As you can see from a straight-on shot, it doesn't look too interesting.

    But raising the camera more than 10 feet creates a better perspective. 

    While Edelman suggests tipping the monopod forward to get an angle, I have a tilt-pan head on mine, so I could adjust the angle before raising it.

    In the video, Edelman suggests using a painter's pole if you want to get more elevation. Frankly, I wouldn't put a really good camera up on one, for fear of an accident, or make sure it was the best pole ever made.   

Tuesday, February 28, 2023

DIY snoot delivers light to right where it's needed

    Electronic flashes are easily one of the great innovations in photography, making it easier to get indoor photos.

    But when you're ready to get past the harsh light coming from either on top of the camera or alongside it, there are a variety of ways to modify the light, either commercially or homemade, and go for a more artistic look.

    In previous posts, we've talked about softboxes and reflectors take the edge off the flash's harsh light, and an adapter for macrophotography.

    Today's installment deals with snoots, which turn the flash into a spotlight, putting a small relatively tight spot of light on a subject.

    While a grid, which we talked about building earlier, may seem to do the same thing, there's a difference. The grid's honeycomb pattern not only directs the light into a tighter area, it also feathers the edges so it's not so harsh.

    A snoot instead throws a sharply defined beam of light at its target. This can be good for creating a hairlight to separate your subject from a background or to create a shaft of light effect.

    My DIY snoot consists of postal box cardboard formed around the flash head, creating a tube that funnels the light forward. While some have used Pringles potato chip cans for this purpose, I found it was too narrow to put my flash head in straight on, and the bouncing in the macro tube was not effective for long distance.

        Now, to see how it works

    First, a photo with the unmodified flash, to serve as the baseline.

    With our DIY grid. See how it's a narrower beam but just fades off on the edges.

    The snoot produces a tight, harsh light. If you wanted to create the look of a shaft of light, this would be an effective tool for the job.

Tuesday, February 14, 2023

Work flashlight can aid aiming speedlights in studio settings

     When you start using off-camera flashes, usually the first lights you're going to use are your speed lights.

    One drawback with they have, compared to their larger, brighter studio cousins, is the lack of a modeling light.

    A modeling light is a small lamp, incandescent or now, LED, that shows the photographer where the light from the flash will fall, especially if it's used with a modifier. You likely saw these if you ever went to a photo studio for a portrait, or when you had photos taken at school; it's that glow you see coming from the umbrellas or softboxes before the picture's taken.

    Modeling lights are helpful if you're trying to set up a Rembrandt lighting (that's when one side of the face is illuminated more than the other side, but you have that triangle of light on the cheek on the darker side), or trying to adjust a rim light.

    You can still work without a modeling light, but that can involve quite a bit of trial and error, which might not go over well with some subjects who might question your competence behind the camera.

    But there is a way to at least get a similar effect and get your lighting within the ballpark, and just require a little bit of fine-tuning.

    Remember the flashlights I mentioned earlier as a night-photography light? You can use that as a makeshift modeling light.

    And it will only set you back 99 cents at Harbor Freight, unless you catch one of their free giveaways.

    For this to work, you make sure the main light is on, and center it over your flash head, or the center of your softbox. This will show you where the light is generally falling, and you can adjust the light's position as needed.

    It won't be as WYSIWYG* as a modeling light, but it will give you the general idea of where your light is going to go, and that should mean fewer adjustments when you start shooting.


    *What you see is what you get. It's a term first coined when word processors began to show you how your document would actually look with the chosen fonts and text styles.

Tuesday, October 25, 2022

How to bring out the inner glow of your jack-o-lantern


Photo by Skyler Sawyer on Unsplash

     Halloween is fast approaching, and one of the traditional decorations is the jack-o-lantern.

    Some range from the minimalist designs with a mouth, nose and eyes cut away from the gourd, while others are more elaborate pictures. The best way to photograph them is with the primary light source being the one that is inside the pumpkin. And that means adjusting your camera to only capture that light.

    Over on Instructables, user jenleigh offers some basic tips for doing it. She suggested making sure there is a fairly strong light inside the pumpkin, either a pumpkin light or a bright flashlight. I think you might get a good effect with a remotely fired flash inside the pumpkin. The best way do that would be to have the flash on the bottom and pointed at the top, illuminating the inside.

Tuesday, September 27, 2022

Panoramas allow you to go wide, even if you don't have a wide-angle lens

        Baltimore Harbor, as seen from the ramparts of Fort McHenry.

     Panoramas are probably one of the oldest types of photos, dating back to daguerreotypes with sweeping views of cities.

    It is a format that's especially good for landscapes or if you're capturing something really large. Photographer David Bergman has done "gigapans" where he captures ultrahigh resolution panoramic shots where you can zoom in on individual details in the photos.

    There have been special cameras made for panoramas, including some that had rotating lenses that would cover multiple frames of film to capture the image. But a more common way to do it is to put multiple pictures together, which is how the originals were made.

    In this day, it is fairly easy to make panoramas regardless of what camera you use, especially with computers doing the stitching seamlessly.

    If you have a cellphone camera, you most likely have a pano feature built into the camera. All you have to do is press the shutter button and move the camera in the direction shown on screen to capture a panorama.

    The key to a successful one is to keep the camera steady, not jerking it around up or down, which will ruin the photo.

     If you have another type of camera, be it a point-and-shoot, bridge, mirrorless or DSLR, there are ways to create panoramas. It involves taking a series of pictures and then stitching them together in a computer.

    To get the best results, you want to shoot in portrait (vertical) orientation, as this will make assembling the panorama easier, as there will be fewer awkward edges that will have to be cropped out.

    You also want to lock your exposure to ensure the pictures have a uniform look, or the finished picture is going to look awkward, unless you spend extra time balancing out exposures in post. You should have some overlap, about 10-20 percent, to make it easier to join them and avoid any gaps.

    There are a few options for stitching them together.

    One way is a bit more artisanal. Basically open the pictures in your photo editor and line them up, doing some cropping and masking to eliminate seams.

    Some photo editors, such as Adobe Lightroom Classic, will automatically stitch the pictures together into a seamless panorama.

    There are also free software options that will stitch your photos together. One of the best is Hugin, which runs on both Windows and Mac, that lets you stitch traditional 180-degree and 360-degree panoramas.  

Tuesday, August 2, 2022

MyTracks offers efficient way to track where you took photos

    My first tip on this blog was using an old cellphone to generate a GPS tracklog for tagging your photos.

    At the time I wrote it, I was using GPSLogger II on a BlackBerry Bold.

    Since then, the BlackBerry finally got to the point where it won't run most apps anymore because its operating system is antique (in computer terms). I switched to using my regular phone, until my wife upgraded our phones and I retired my Samsung Galaxy J3 to GPS logging duty, which it does quite well.

    But in recent months I switched over from GPSLogger II to MyTracks.

    MyTracks, by Daniel Qin, is available on both Android and IOS, and has a companion desktop app for the Mac. I've found it better than GPSLogger for a few reasons.

    First, starting and ending a track is a one-click operation. I've lost a few tracks on GPSLogger because I forgot to click the dialog box asking for the track name. Likewise, GPSLogger asks if you really want to stop.

    Second, I found it has tracked well, whether I'm inside a building or outdoors. I've been able to generate decent tracks in the basement of the county jail.

    Finally, exporting the track file is much simpler with MyTracks.

    I can simply export the track directly into Google Drive, where I can access it from my photo-editing software.

    GPSLogger, on the other hand, did not offer a simple export to my Google Drive. Instead, I had to email it to myself, then transfer the file from my email account to the drive and extract the track from the zip file before I can use it.

    It's a lot of work.

    The only drawback is that if you use the free version of the program, you have to watch a video ad before you can export once the trial period is over. But the features still work, and it's something I can live with for the time being.


Tuesday, June 21, 2022

Video can help when your motor drive isn't fast enough

    Back in the days when cameras would take only one picture when you pressed the shutter, you wound up missing a lot.

    It took time and good reflexes to capture a particular point in fast-moving action back in the film day. I remember going through more than a few takes trying to get a photo of a dart hitting a balloon for a photo class project on "hard and soft."

    While there were motor drives back then, three shots per second was the usual speed, which meant you'd burn through a 36-shot roll in 12 seconds.

    Today, even so-called "entry level" cameras can fire off six frames per second when in drive mode, and with memory cards that hold far more data than the computers that guided the Apollo Moon missions, you can shoot for a while.

    But sometimes that's even not fast enough, as Sony has now got some of its cameras operating with drive speeds of almost 50 frames per second — if you're willing to invest a couple thousands dollars just for the body alone.

    But if you want to get to that speed, there's a way to do it, even with a cell phone. Shoot a video instead.

    A couple caveats first: You're likely not going to get the full pixel count your sensor normally gives you since video is cropped to either a 720 or 1080 format. You might get closer if you're using a 4k video resolution.

    You'll also have an image that's in a 16:9 aspect ratio, but that's not a deal breaker. And you'll most likely be working with a jpg image, which hobbles some post-processing options you would have if you were shooting raw instead.

    But this is a cheap, effective way to get even higher motor-drive speeds than your camera can produce. Some cameras will let you shoot video at 60 frames per second (that's the speed that makes professional and college sports coverage on TV look crystal clear).

    I actually discovered this trick while shooting video of training a National Guard brigade was doing at the Yakima Training Center, a sprawling military installation in Central Washington*. One of the things I shot was a crew firing a howitzer.

    I wanted to send a picture to one of my sons, so I scrubbed through the video to find a picture of the smoke coming out of the gun's muzzle block. I found my frame and did a capture with the editing software I was using, and then processed the photo.

    It was at that point that I discovered I had something incredible. In the photo below, you can see the artillery shell coming out of the cloud of smoke at the end of the barrel.

    I doubt I would have got that if I were shooting stills with the drive running (for that camera) at its full speed of 6 fps.

    It's not something I would do every day, but if you have a situation where you need that extra bit of speed in the number of frames you're shooting to catch some fast-paced action, your camera's video function is a great tool to have in your box.

    (*The Yakima Training Center is where they also filmed the combat scenes in Audie Murphy's "To Hell and Back.")

Tuesday, March 1, 2022

Photographer's Companion a Swiss-Army-Knife app for serious shooters

    There are lots of apps on the market that can help with your photography.

    You can find apps that will turn your phone into a light meter, tell you when blue and golden hour are in your area and do a variety of functions.

    But if you have limited space on your phones (because companies will make it virtually impossible to delete some of the apps on your phone even if you'll never use them), you may find yourself picking and choosing which program to use.

    Or, you can just download one that can do most of the tasks you'll need.

    I would submit that the Photographer's Companion, available for both Android and iPhone, fits the bill nicely. Developed by Stef Software, it comes in free and paid versions, with the main difference being that the paid version has no ads and a few extra features.

    Personally, I've found the free version suits my needs, as most of the additional features in the paid version are things I wouldn't use or, in the case of flashlight and level, I already have on my phone or on my camera.


    For starters, this program gives you at the very minimum a reflected light meter. If your phone has a light sensor on it (this is usually used to adjust your screen brightness in relation to ambient light), you also get access to an incident light meter. This can come in handy when you're shooting manual or, as I did when I did a little photo project with my mother's old Argus C-3, the camera you're using doesn't have a light meter.

    You can also select your camera model or input the specifications, so it will be able to calculate things such as field of view and depth of field for your specific camera and lens combination. You can also use it to calculate proper flash settings, which is helpful in studio work or if you're using a non-dedicated flash on your camera.

    It can also show you when sunrise and sunset will occur in your area, as well as when to expect blue and golden hours, those times when light is at its most magical for photography. It can also show you the phase of the moon and the optimal exposure time for getting a picture of the moon or a moonlit scene.

    For those into astrophotography, it also uses the NPF rule for calculating the best exposure time to get no star trails.

    And each section has a help button that takes you to the website to get a tutorial on how to use that particular part of the app, as well as explain the principle behind it.

    This is not sponsored content, and I only use the free version, but I recommend it as a way to get some good high-quality photo apps without straining your phone's memory.

Tuesday, January 4, 2022

Getting 360-degree panoramas with your cellphone with help from Google

    We've all seen those photos on Google Earth and Street View that show a 360-degree panorama of a subject.

    It gives you a chance to see an area as if you were actually there. When my wife and I were house-hunting after I had gone ahead for a job, we would use Street View to take virtual driving tours of neighborhoods where we were looking to buy, so we could both get a sense of the area.

    While Google uses a sophisticated camera mounted on a car, or backpack for trail views, and dedicated 360-degree cameras are in the triple digits, you can do it yourself inexpensively if you have a cellphone camera.

    If you use an Android (sorry, iPhone users), you can get a VPai Clip for your phone. The golf-ball-sized device, which I got online for less than $20, is not a camera as much as it is a pair of lenses for your cellphone. Each lens captures a 210-degree field of view.

    I know what you're thinking: That adds up to 420 degrees, and a full circle's only 360 degrees. Well, those additional 60 degrees allows the software you download on your phone to overlap and seamlessly stich the pictures together to create a 360-degree photo that you can see as a panorama, a sphere or a "little planet."

    If your phone's only capable of FHD video resolution, the image quality may not be the greatest and you'll have to upsize it to post it on Google Street view, but in the words of Krusty the Clown, it's not just good, it's good enough. Check out this one I did recently.

    But if you're using an iPhone, or don't want to get an attachment for your phone, Street View has you covered.

    The Google app has an option that allows you to use your camera's full resolution and optics to capture a photo sphere. It takes patience, a willingness to have people think you're a bit insane and a pair of steady hands.

    When you go to take a picture, the app will display a dot on the screen for you to line up on, and when you line up it takes the picture and moves the dot to the next spot. Eventually, you'll do a full 360-degree arc horizontally and vertically.

    If you do this, it's important to stay in one spot and turn in place, otherwise it won't quite line up as well, and you might miss spots, as I did in this one of the Alamo.

    Or this one in the torpedo room of the USS Blueback in Portland, Ore.

    But if things work out, you get a reasonably good shot, like this one:

    Let me know what you think, or if you try this, share links in the comments below.

Tuesday, November 23, 2021

Household photography hacks

    When he was the host on DigitalRev TV, Kai Wong did a video showing a few DIY photo hacks done mostly with items found around the house.

    Among the hacks he shows are filling a bag with popcorn kernels to use as a makeshift stabilizer, using a couple key rings and zip ties to hook a strap to your tripod and using an old nylon stocking as a soft-focus filter.

    Some of the hacks are worth trying out, although if you are going to do the Vaseline diffuser, I would probably get a cheap UV filter dedicated to that rather than trying to hold up a sheet of glass in front of your lens.

    Do any of these interest you? Or do you have a suggestion on household photo hacks?

Tuesday, October 26, 2021

Getting close to eliminate reflections

    There are times when you want a reflection in you picture for artistic purposes, but there are more than a few times when it's a pain in the tuchus.

    This usually happens when what you're photographing is behind glass, such as in a display case, you're looking out a window or standing on top of the Space Needle in Seattle, where even on the outdoor deck you're behind glass.

    Some ways to get rid of the reflection, if it's ruining your composition, include changing your angle so the reflection isn't going straight into your camera lens (angle of incidence = angle of reflection) or using a polarizing filter.

    The only drawbacks with those methods is you might be limited in moving to the sides, and the light may be at the wrong angle for a polarizer, which works best when the light's coming from a right angle.

    While reflections can be eliminated in post (I had to do that with a picture I took of a stained glass window in a museum), that can be extra work you wouldn't need to do if you can eliminate the reflection before you trip the shutter.

    But Jefferson Graham, a writer/photographer/Youtuber, suggests getting right up against the glass.

    It's not a bad strategy, as you are blocking the light causing the reflection from your lens.

    (Do not try this tip with a museum display case. You may either knock over the display or set off an alarm.)

    The only thing I take issue with him on this matter is his suggestion that this option only works with phone cameras, as they typically have a flat lens. A DSLR, he argues, has a curved lens and can't be put in such contact.

    To which I call shenanigans.

    First, most of us use UV or skylight filters on the front of our lenses to protect them from damage, so we do have a "flat" surface to put against the glass.

    Second, a lens hood also provides the shading that can keep the stray light from messing up your photo. It works especially well if you have a collapsible rubber hood. Just make sure the hood is right for your focal length or you'll get vignetting.

    Another option to have a friend hold a jacket up behind you to block anything behind you from being reflected in the window. Just make sure they hold it in front of them, so you don't get their reflection in the window instead.


Tuesday, September 14, 2021

Feeling the need for speed? Try slowing down

    You're taking a photo of something that's moving, and you want to convey a sense of speed, even if the subject isn't moving quickly.

    The quickest and best way to do this is to slow down your shutter speed, which will cause the moving subject to blur in its line of motion and create the illusion that it is moving quickly even if it's moving relatively slowly.


    In this picture taken near the Northern Pacific Railway Museum in Toppenish, Wash., I got a freight train going past the old depot that houses the museum. At this point, the train is passing through town and just went over a rail crossing, so it's only going about 25 mph. Not terribly fast.

    But I set my ISO to 100 and stopped down to f-29, which gave me a shutter speed of 1/5 of a second. That caused the train to blur significantly as it went down the rails, while the depot and lamp post remain clear, helping further sell the concept.

    (In case you're wondering, I actually hand-held this photo as it was a relatively spur-of-the-moment shot. Since I don't drink coffee, my hands are fairly steady. But a tripod would not hurt, especially if you want to use even slower shutter speeds.)

Tuesday, August 31, 2021

DIY fluorescent LED bulbs provide customizable lighting alternatives for photos, video


    Along with clamp lights, another option for continuous lighting are LED fluorescent tubes.

    Adam from Droi Media did a couple video tutorials in 2019 showing how to make your own light tubes, as well as a mount and dimmer for them. He estimates the costs for the lights at less than $25 a foot.

    Many of you are probably thinking that sounds pretty stiff since you can get a 4-foot LED fluorescent tube for about $63 at a warehouse hardware store. And you'd be right, except for two things: 1. That's just the tube and not the mount or the way to power the light; and 2. You have to buy a 4-foot light.

    Adam's plan allows you to customize the size of the light to fit your cases, and they don't require all the other major hardware you need to power them.

    Basically his design involves wrapping LED strip lights around a wooden dowel, attaching wires for the power supply and inserting it in a frosted tube secured by screws through the end caps and hooked up to a power supply. The hardest skill in the whole thing appears to be soldering wire.

    He also shows how to combine them on a mount with a dimmer switch. It's a great addition for your video or studio photography kit, and being LED, which can also run off batteries, used in the field as well.


Tuesday, June 1, 2021

Double the output of your home studio clamp lights

    Photographers moving beyond "natural light" toward studio lighting usually start out with continuous lights.

    It's not a bad idea, as it is a more "what you see is what you get" approach that helps you see the effect light placement and modifiers have before you hit the shutter. Continuous lights are also a necessity for anyone shooting video.

    One of the most economical ways to get a light set up is to use the clamp lights you find at home improvement stores. They're the lights in metalic reflectors that have a clamp you can attach to a stand, shelf or other object to position the light.

    However, one of the limitations of the light is that they only take one light bulb, and finding bulbs with high enough lumens for a reasonable shutter speed can be difficult. And if you are using halogen bulbs, you're going to run into a wattage limit on the lamp as well as overheating issues.

    But there is a way to boost the light output without turning the studio into a sauna or risking an electrical overload.

    For starters, go with LED lamps. They produce the same amount of light for a fraction of the energy, which means they don't heat up as much. That comes in handy if you need to put a diffuser or color gel on the front of the light. Growing up, I can remember a few lamp shades that were damaged because they got too close to the bulbs.

    LEDs also come in different color temperatures, so you can get daylight-balanced lights or go with tungsten and set your camera to the precise color temperature, saving you a bit of work in post production.

    But you still have the issue of just one light socket in the lamp. But there's a way around that, and I have to give credit to The Frugal Filmmaker, Scott Eggleston, for this idea.

    The Home Depot and other hardware stores sell twin-socket lamp adapters. They screw into the socket and give you two light sockets, allowing you to put two bulbs in, doubling the light output.

    In my setup, I use brooding lamps, which offers both a larger reflector as well as having a 300-watt rating, giving me more than enough margin for safety. In the lamp, I have two daylight-balanced 100-watt-equivalent LED bulbs that throw out a tremendous amount of light.


    It's a setup that provides a decent lighting system for both video and studio photos, whether you're doing portraits or just photos for your eBay/Etsy/Amazon page.

Tuesday, April 7, 2020

Jared 'The Fro' Polin offering free photography training downloads during the coronavirus pandemic


    Most, if not all, of us are pretty much confined to home in an effort to beat COVID-19 into submission.

    And while it's necessary, it's also giving people cabin fever, especially parents trying to keep their kids occupied. Fortunately, I can still work from home and get out occasionally (I'm deemed an essential worker by my state government and have a letter of transit that lets me go out for work).

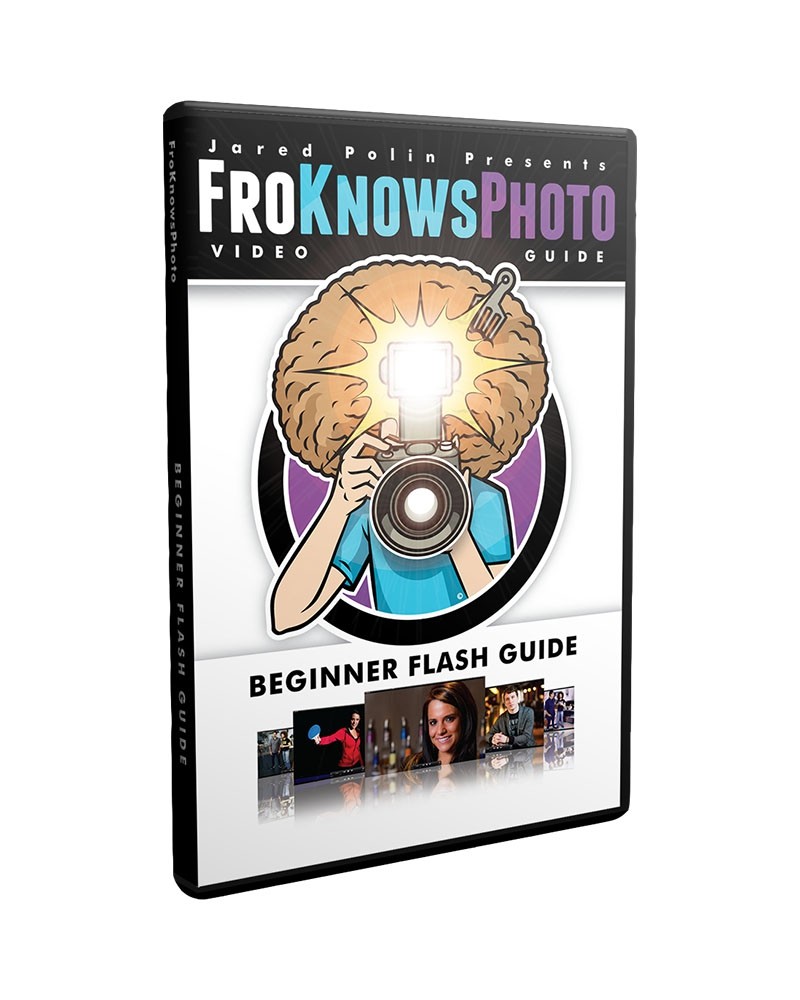
    Jared Polin, of froknowsphoto.com, is proving himself to be a genuine mensch during this trying time. Polin has offered two of his video guides, FroKnowsPhoto Guide to Getting out of Auto and FroKnowsPhoto Beginner Flash Guide for either free or whatever people feel like paying.

    The offer was meant to help people who are homebound to learn more about photography, or help their kids learn photography. While they are free, Polin said people who want to pay something can.

    He estimates that more than $1 million worth of the videos have been downloaded. It's a limited time offer, and let's hope and pray that this offer runs out soon.

    Thanks, Fro.