Search This Blog

Showing posts with label video. Show all posts

Tuesday, December 6, 2022

Compress time with time-lapse photos from almost any camera

    One real fun shot is the time lapse.

    We've all seen those videos that show people and other things moving at high speed, clock hands moving quickly or or a storm front come through like an express train with no brakes.

    Those are done through time-lapse photography, where a picture is taken at intervals and then assembled together into a video. It's one of those things that allows us to see things we usually can't see because they take a long time.

    And while there are fancy cameras that can be used to take them, it's also possible to use the kit you've already got to make a decent photo.

    First, if you use a cellphone, you might already be set, or at least one visit from the app store away from producing time lapses.

    Apple's iPhones, going back to at least iPhone 5, have a time-lapse option on the camera. You just put the phone on a tripod or other secure holder, push the button to start and then let it run until you're ready and it the button again.

    The phone will convert the series of pictures it has taken into a video. Depending on the length of time you ran the time lapse, the program will cut out frames in order to keep the video to the length predetermined by Apple.

    If you use an Android, you're out of luck with your camera fresh out of the box, but there are multiple apps on the Google Play store that will allow you to do a time lapse. Just read the reader reviews carefully to see which one will work best for you. Some may produce choppy video as it assembles a string of still photos together into a video.

    If you are using a digital camera, there are still ways to do it.

    Some cameras, such as Pentax, will give you the option to do a QuickTime movie, but I've found that it was a bit too jerky for my tastes.

    It should go without saying, but to cover myself, mount the camera on a tripod. There's no way you're doing this hand-held.

    Another way to do it is to take a series of photographs and use them as frames in a video.

    To do this, you might need an intervalometer, which allows you to have your camera take photos in a particular interval. Pentax actually has one built into its camera, but there are apps where you can use your phone as the trigger, or you can invest in a dedicated device.

    Another way to get a series of photos is to use a cable release and, if your camera permits, put it into a drive mode and just lock down the shutter button and let the drive do its work.

    In these situations, you need to figure out how long you want your video to be and the frame rate, which will tell you how many pictures to take.

    You also want to set your aperture and shutter speed to slightly blur moving objects, which will better sell the high-speed effect.

    A few years back, I did a time lapse to highlight a busy intersection the local police identified as a traffic hazard. Working with our paper's chief photographer, we figured out how many shots were going to be needed for the video (I was contributing to a larger video) and the best time to do it.

    After figuring out the right shutter/aperture combination to get the motion, I locked those settings in while setting ISO to automatic. That would allow us to maintain a constant exposure as the sun set.

    While I'm a strong proponent of shooting RAW whenever possible, in this case jpgs were the the better option as they take up less space on the card and would not be as hard to combine for the final video.

    I shot 600 shots, one picture every three seconds for a half hour. I just dialed the time between frames and the total amount of pictures into the intervalometer and sat back with a cup of hot chocolate while the camera did its thing.

    The resulting pictures were then converted into a video, with each shot becoming a frame in the video.

    There are a couple ways to combine them. You can use a video editor or software designed specifically for assembling still images into a video. I used to use Time Lapse Assembler until the software became incompatible with my Mac's OS, but I found QuickTime offers a free way to do it.

    Open up QuickTime Player, select "Open Image Sequence" from the File menu, specify your resolution, frame rate and final video format, and the software does the rest.

    Here's that traffic sequence I did, processed through QuickTime.


Tuesday, June 21, 2022

Video can help when your motor drive isn't fast enough

    Back in the days when cameras would take only one picture when you pressed the shutter, you wound up missing a lot.

    It took time and good reflexes to capture a particular point in fast-moving action back in the film day. I remember going through more than a few takes trying to get a photo of a dart hitting a balloon for a photo class project on "hard and soft."

    While there were motor drives back then, three shots per second was the usual speed, which meant you'd burn through a 36-shot roll in 12 seconds.

    Today, even so-called "entry level" cameras can fire off six frames per second when in drive mode, and with memory cards that hold far more data than the computers that guided the Apollo Moon missions, you can shoot for a while.

    But sometimes that's even not fast enough, as Sony has now got some of its cameras operating with drive speeds of almost 50 frames per second — if you're willing to invest a couple thousands dollars just for the body alone.

    But if you want to get to that speed, there's a way to do it, even with a cell phone. Shoot a video instead.

    A couple caveats first: You're likely not going to get the full pixel count your sensor normally gives you since video is cropped to either a 720 or 1080 format. You might get closer if you're using a 4k video resolution.

    You'll also have an image that's in a 16:9 aspect ratio, but that's not a deal breaker. And you'll most likely be working with a jpg image, which hobbles some post-processing options you would have if you were shooting raw instead.

    But this is a cheap, effective way to get even higher motor-drive speeds than your camera can produce. Some cameras will let you shoot video at 60 frames per second (that's the speed that makes professional and college sports coverage on TV look crystal clear).

    I actually discovered this trick while shooting video of training a National Guard brigade was doing at the Yakima Training Center, a sprawling military installation in Central Washington*. One of the things I shot was a crew firing a howitzer.

    I wanted to send a picture to one of my sons, so I scrubbed through the video to find a picture of the smoke coming out of the gun's muzzle block. I found my frame and did a capture with the editing software I was using, and then processed the photo.

    It was at that point that I discovered I had something incredible. In the photo below, you can see the artillery shell coming out of the cloud of smoke at the end of the barrel.

    I doubt I would have got that if I were shooting stills with the drive running (for that camera) at its full speed of 6 fps.

    It's not something I would do every day, but if you have a situation where you need that extra bit of speed in the number of frames you're shooting to catch some fast-paced action, your camera's video function is a great tool to have in your box.

    (*The Yakima Training Center is where they also filmed the combat scenes in Audie Murphy's "To Hell and Back.")

Tuesday, November 9, 2021

How to turn a dishpan and cake dish into a monster DIY studio light

    If you are looking for a way to really light up what you are shooting, you might want to take a trip to the kitchen aisle of the local store.

    Griffin Hammond, of Indy Mogul fame, did this video showing his plans for a DIY studio light that had the output of the equivalent of 13 60-watt incandescent light bulbs. While the video is about nine years old, his idea is still a good one.

    His light uses a deep plastic dishpan for a reflector around the lights, which are in socket splitters in four light sockets, with the cake pan serving as the electrical box for the rig.

    Griffin's rig uses eight 100-watt-equivalent CFL bulbs, but LED bulbs should work just as well. He estimated the cost of the rig at $85, but it's not a bad price if you compare it to a commercial rig with similar output.

    You can also lower that price point by purchasing some of the supplies at your local dollar store instead of the big box stores. You'll probably still need to go to the hardware store for the lighting rigs.

    Griffin's rig requires some knowledge of electrical wiring, and his video doesn't clearly show the wiring pattern. If you'd rather not bother with making your own electrical circuits, some of the commenters on the video suggested using a power strip with plug-in light sockets, simplifying that part of the project.

    I would probably paint the outside of the pan black, giving it a better appearance as well as minimizing light spill.

    From his video, it looks like a great option if you're shooting video or prefer to use continuous lighting in your photo studio.


Tuesday, August 31, 2021

DIY fluorescent LED bulbs provide customizable lighting alternatives for photos, video


    Along with clamp lights, another option for continuous lighting are LED fluorescent tubes.

    Adam from Droi Media did a couple video tutorials in 2019 showing how to make your own light tubes, as well as a mount and dimmer for them. He estimates the costs for the lights at less than $25 a foot.

    Many of you are probably thinking that sounds pretty stiff since you can get a 4-foot LED fluorescent tube for about $63 at a warehouse hardware store. And you'd be right, except for two things: 1. That's just the tube and not the mount or the way to power the light; and 2. You have to buy a 4-foot light.

    Adam's plan allows you to customize the size of the light to fit your cases, and they don't require all the other major hardware you need to power them.

    Basically his design involves wrapping LED strip lights around a wooden dowel, attaching wires for the power supply and inserting it in a frosted tube secured by screws through the end caps and hooked up to a power supply. The hardest skill in the whole thing appears to be soldering wire.

    He also shows how to combine them on a mount with a dimmer switch. It's a great addition for your video or studio photography kit, and being LED, which can also run off batteries, used in the field as well.


Tuesday, June 1, 2021

Double the output of your home studio clamp lights

    Photographers moving beyond "natural light" toward studio lighting usually start out with continuous lights.

    It's not a bad idea, as it is a more "what you see is what you get" approach that helps you see the effect light placement and modifiers have before you hit the shutter. Continuous lights are also a necessity for anyone shooting video.

    One of the most economical ways to get a light set up is to use the clamp lights you find at home improvement stores. They're the lights in metalic reflectors that have a clamp you can attach to a stand, shelf or other object to position the light.

    However, one of the limitations of the light is that they only take one light bulb, and finding bulbs with high enough lumens for a reasonable shutter speed can be difficult. And if you are using halogen bulbs, you're going to run into a wattage limit on the lamp as well as overheating issues.

    But there is a way to boost the light output without turning the studio into a sauna or risking an electrical overload.

    For starters, go with LED lamps. They produce the same amount of light for a fraction of the energy, which means they don't heat up as much. That comes in handy if you need to put a diffuser or color gel on the front of the light. Growing up, I can remember a few lamp shades that were damaged because they got too close to the bulbs.

    LEDs also come in different color temperatures, so you can get daylight-balanced lights or go with tungsten and set your camera to the precise color temperature, saving you a bit of work in post production.

    But you still have the issue of just one light socket in the lamp. But there's a way around that, and I have to give credit to The Frugal Filmmaker, Scott Eggleston, for this idea.

    The Home Depot and other hardware stores sell twin-socket lamp adapters. They screw into the socket and give you two light sockets, allowing you to put two bulbs in, doubling the light output.

    In my setup, I use brooding lamps, which offers both a larger reflector as well as having a 300-watt rating, giving me more than enough margin for safety. In the lamp, I have two daylight-balanced 100-watt-equivalent LED bulbs that throw out a tremendous amount of light.


    It's a setup that provides a decent lighting system for both video and studio photos, whether you're doing portraits or just photos for your eBay/Etsy/Amazon page.

Thursday, May 21, 2020

Getting ready for your video closeup

   With the coronavirus pandemic keeping most of us at home, more people are using videoconferencing to stay in touch.

    People are using Microsoft Teams, Zoom and other platforms for business and socializing.

    In many of these conferences, the participants look a bit pale, mainly lit by the glow of their video screens, which if there's other lighting in the room creates color shifts as the webcam tries to find a white balance.

    If the room is dim, the image will be grainy.

    And there's a lot of room tone as people use the microphone on their computer for the sound.

    For some people, that may be enough, but there are simple but effective ways to improve the quality.

    First, improve lighting. You don't need one of those three-point softbox setups some of the professional Youtubers use. I found that a simple desk lamp is more than enough to light me up properly, giving me a cleaner look on video.

This is where I do my work video calls/conferences. The light on the right just clamps to the desktop and lights up my face. I use a headset for the audio, and I've been pleased with the results these past two months.

    As for sound, you can either use a headset, a lav mic or even one of those hands-free devices for cellphones, as long as it has a plug that fits into your computer. That's usually enough to ensure you don't sound like you're talking from the bottom of a chimney.

Tuesday, April 7, 2020

Jared 'The Fro' Polin offering free photography training downloads during the coronavirus pandemic


    Most, if not all, of us are pretty much confined to home in an effort to beat COVID-19 into submission.

    And while it's necessary, it's also giving people cabin fever, especially parents trying to keep their kids occupied. Fortunately, I can still work from home and get out occasionally (I'm deemed an essential worker by my state government and have a letter of transit that lets me go out for work).

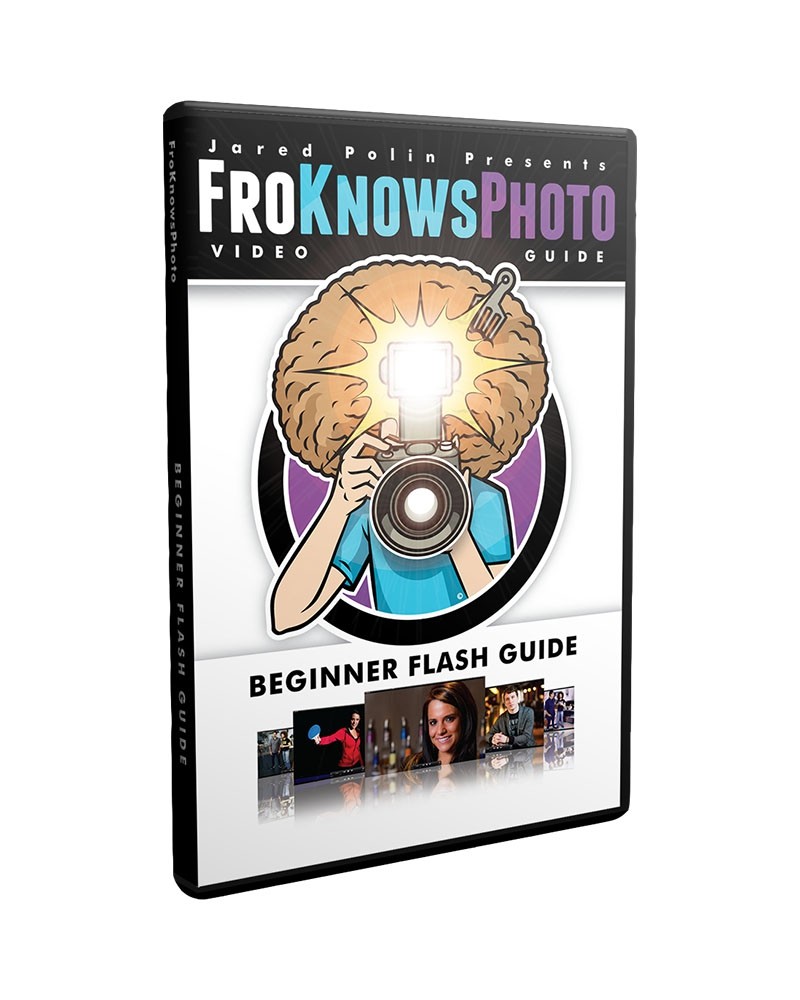
    Jared Polin, of froknowsphoto.com, is proving himself to be a genuine mensch during this trying time. Polin has offered two of his video guides, FroKnowsPhoto Guide to Getting out of Auto and FroKnowsPhoto Beginner Flash Guide for either free or whatever people feel like paying.

    The offer was meant to help people who are homebound to learn more about photography, or help their kids learn photography. While they are free, Polin said people who want to pay something can.

    He estimates that more than $1 million worth of the videos have been downloaded. It's a limited time offer, and let's hope and pray that this offer runs out soon.

    Thanks, Fro.

Saturday, July 27, 2019

PVC Shoulder Rig real-world review

    In March, I wrote about the PVC shoulder rig I built, following the pattern used for the "Lars Cam" by The Slanted Lens.

    Since then, I've had a few opportunities to use it in real-world situations, and overall I have to say it has been a success, albeit while finding an area where the design could be tweaked.

    First, I opted to use tape instead of paint to cover the PVC pipe. But, unlike the Slanted Lens' version, I went with cloth hockey-stick tape rather than electrical tape. Aside from cost, the stick tape does not get slippery or come off like electrical tape, and it offers a better grip. After all, that's what stick tape is designed to do.

    It also gives the rig a good, finished look. I also chose to wrap the T-joint, which the crew at The Slanted Lens left undone.

    My first use of the rig was while covering a demonstration of high-tech gear for the battlefield. I was being shuttled around a sprawling military base by van.

    One advantage of the rig is the fact that I was able to disassemble it partially, making it easier to stow between stops. I can also leave it assembled and turn the handles and back support so it can store flat, which is also handy.

    As you can see in the video (and I apologize for the bad audio in the second half. I had a recorder die on me, and I think my phone's on-board mic got covered), that there is some slight movement, but it is steadier than trying to just hand hold it without any support.

    The next time I used it was at a fund-raiser where people were rappelling down the side of a building to raise money for a cancer-support group. Again, I got good results with the rig, and I also discovered that when I put the camera down and let go, the shoulder support held it on my shoulder while the handles kept it close to my body.

    As for improvements I would make, I would probably install a quick-release-plate system to the rig to make it easier to attach the camera.

    Other than that, it's a design I look forward to continually using in my video projects.

Monday, March 11, 2019

PVC shoulder rig for less than $10

    If you've ever tried to shoot handheld video, you know camera shake is a thing, even if you've got the steadiest of hands.

    There are a few tricks to get around it. Knoptop suggests using your camera strap, pulling the camera away from you until the strap is taut, providing some stability to the camera. While Scott Eggleston, aka the Frugal Filmmaker, has advocated for cage-like rigs, such as one made out of my favorite material, PVC, and another that is group of flash brackets mounted together.

    But many people have found that shoulder rigs provide great stability for a few reasons. First, you are using your shoulder and body mass to provide stability, and with the right handles, it gives three points of contact. A shoulder rig also puts the camera right about eye level.

    There are plenty of plans for DIY shoulder rigs out there, but the one I liked the best — for the most part — was the one the crew at The Slanted Lens came up with. Dubbed the "Lars Cam," it consists of a 10-12" length of 1-inch PVC pipe, a 1-inch T-joint and three 1-inch 90-degree PVC electrical conduits, along with a 1/4x20 bolt to hold the camera on to it. The tools consist of a power drill (I recommend using a 9/32 bit, as it makes it easier to insert the bolt in the hole), and a way to cut PVC pipe. My personal choice is a pair of ratcheting PVC pipe cutters.

    I spent $6.72 at Home Depot on the conduit, T-joint and bolt (actually, the bolts came in a three-pack with nuts). I was able to get a short length of PVC pipe from a friendly plumber for free from his scrap collection. 


    From my test run with it, the rig is quite stable and handles smoothly. You can still reach up to adjust focal length or focus, resting one of the handles either in the crook of your arm or on your forearm.

    At this point, I am debating whether to use tape to cover the PVC, as the Lars Cam's inventor did, or spray paint. I am also planning to borrow another trick from Knoptop and putting a craft-foam pad around the bolt to better hold the camera.


Monday, March 4, 2019

Low-cost ways to set focus for your videos


    If you're working by yourself, getting your camera focused to where you are going to be in front of it can be a challenge.

    There are some tricks, such as using a remote to trigger the autofocus on the camera while you're standing in position, and then quickly locking it in by going to manual focus. But not everyone has a remote trigger.

    Another way is to put something where you will be,  focus on it, and then step into position.

    Dave Knop, AKA Knoptop, has a couple suggestions in a Youtube video.

    One is using a polystyrene mannequin display head, which you can pick up at a local wig shop or on Amazon. But if you either don't want to spend the money or have Jeff Bezos' algorithms making wild assumptions about you, Knoptop offers a cheaper solution that you most likely have laying around your house: A plastic, one-gallon jug.

    Knoptop said they can easily be used as a head to either hold hats and wigs, or as a focus stand-in. He recommends using a milk jug (not those big. square-ish ones you get at Costco), after rinsing it out, of course. For me, I have distilled water jugs sitting around that don't need as much cleaning.
 
    Knoptop said you can paint it, cover it with comic book art or whatever you want. I would recommend something that creates an easy focus pattern, maybe something like this modge-podged to the outside. To make it really utilitarian, you could also paint it a neutral gray tone so you can set color balance as well.

    I think the best part of it is you can fit it on a light stand, especially if you are using a PVC lightstand.


Wednesday, September 21, 2016

Improving video sound quality for less than $5

    As you recall from an earlier post, I discovered that using my digital voice recorder improved the audio quality of my videos.

    But I knew I could do a bit better. Having my subject hold a voice recorder was not exactly the most professional approach, and it did have some problems with wind, as I learned early one morning in a cherry orchard.

    I started looking at lavaliere microphones, but a lot of them were quite expensive, starting at $20.

    Then, I found this lavaliere on eBay for $3.99. I decided to take the gamble, and it paid off. The microphone comes with a foam wind cover, a 6-foot cable and is stereo. I combined it with my Sony digital voice recorder, and I found the sound quality is incredible.

    Here's a sound test video I made to show my co-workers how well this mic works. It goes from the shots with the mic to straight out of the camera and back to the mic.


    Plus, another benefit I noticed is that it makes me seem more professional when I mic someone, rather than either asking them to hold a recorder or getting in their face with an cellphone.

Wednesday, February 24, 2016

How to have sound in your video that doesn't suck

    When I was mostly an ink-stained wretch, I asked my TV colleagues why they had to mic up the people they were interviewing rather than rely on the microphone on the camera.

    "Because that sounds terrible," they would explain.

    Doing just home videos at the time, I didn't think it was much of a big deal.

    But later, when I started doing more multimedia journalism, I realized they were right. Shooting with an iPhone or a bridge camera in courtrooms or outdoor locations produced sound that was downright awful.

    I tried attaching a mic to the Lightning port on the iPhone, but there was some interference, and the sound quality did not improve drastically. I tried boosting the volume in post, but that did not help; in some cases it made things worse.

    The bridge camera, like many prosumer DSLRs, does not have a mic jack, so attaching a microphone to that was out of the question.

    Then, after doing some reading in online video tutorials, I decided to do what other shooters, even Hollywood productions do: record the sound separately and merge it in post.

    Editing software, such as Final Cut Pro or Adobe Premiere, can automatically sync a recorded soundtrack with the camera audio, especially if there is a reference sound, such as a clap or saying the word "Go."

    (Those clapper boards you always see in movies to signal the start of a shoot? That's used to create an audible and visual sync point for the audio editors.)

    To record the audio for my video, I used a voice recorder. Testing it in my living room, the results were remarkable. The camera audio picked up a lot of ambient room noise, while the voice recorder was a cleaner sound.

    But, little did I know, the trial by fire was going to be the next day. There was a fire at the local homeless shelter's recycling center. I did a quick raw video with the iPhone to get something up on the web, and then started shooting B-roll with the bridge camera.

    Finally, I interviewed the fire department spokesman, under probably the worst possible audio conditions. We were outdoors, three fire engines idling in the background and a 10-mph wind blowing across the scene.

    Here's the straight-out-of-camera video.


    Awful, isn't it? There was no way I would be able to use that for the website.

    If you notice, he's holding the voice recorder, and here's what it sounded like when, back at the office, I used the recorder's sound instead.


    Much better, don't you think?

    I could probably improve it further by using a lavaliere mic, but this technique can also help improve your home videos as well.

    You can see the full video here.