Search This Blog

Showing posts with label Modifier. Show all posts

Tuesday, October 11, 2022

Pringles can offers macro flash diffusion for less than $2

    In a recent post, we discussed ways to do macrophotography if you don't have a dedicated macro lens.

    Now, lets talk about lighting those extreme close-ups.

    While you can use continuous light, such as a desk lamp, you might not have that option if you are shooting outdoors, or if the lights you have won't permit a fast-enough shutter speed to avoid blurring.

    One of the best ways to do that is through camera flashes, but you are going to need to diffuse the light to make it flattering, as well as work well up close.

    One low-budget way to do it is to use a Pringles potato-chip can as a snoot/diffuser for the pictures.

    A Pringles can is particularly suited for this task because the inside of the canister is silver colored, making it more reflective. It also has a clear cap, into which you can put diffusing material to soften the light.

    Plus, Pringles don't leave the same greasy residue behind like traditional potato chips.

    There are multiple tutorials online for how to make this rig, but here's how I made mine.

    First, I picked up some Pringles at the local Walmart for just under $2, and had a nice snack at work for a couple days.

    Then, after sweeping all the chip crumbs out of the tube, I cut out a hole in the side about a quarter-inch from the bottom that was the same dimension as the flash head. While some people cut away the cardboard completely, I chose to leave it as two flaps to better grip the flash head.

    While some people will mount the flash in the back, I found the side mount is better, as the head is straight up, and you can angle it to light the subject in front of the lens. The other way requires sculpting the tube into a particular shape, which only works if you are going to use one particular lens for your macro shoots. I personally prefer to keep my options open.

    For my diffusion panel, I put a circle of copy paper in the cap. After making sure it worked, I then put black duct tape on the outside to give it a relatively professional look.

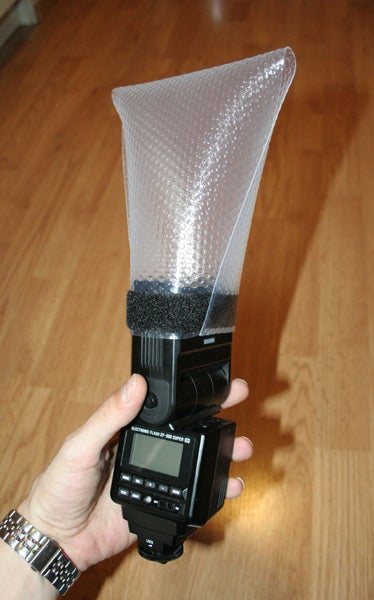
    This is how the rig looks when on the flash and camera, before being covered in duct tape. 

       (Note the guide number of the side of the flash, a tip from an earlier post on flash photography.)
     
     Here's a photo taken with ambient light in the room, with no flash as the control.


    And here's one with the diffuser.

    For this shot, I was using through-the-lens metering for the flash, but you can use a manual flash, but it might take a bit of trial and error.

Tuesday, May 24, 2022

Turn household items into lighting modifiers

    Daniel Norton one of the photographers who appears regularly on Adorama's Youtube channel did a video during the COVID-19 lockdown demonstrating how to turn things around the house into lighting modifers.

    Among the items he uses to modify his single speed light are tin foil and poster board reflectors, as well as wine bottles and honey to create different effects.

    While he was doing it with a small figure on his desktop, the techniques could work for portraits.


Tuesday, December 7, 2021

DIY hack lets you get Gary Fong-like lighting from your speed light

    Speed lights, or flashes as we used to call them, are great for getting lighting where it's needed.

    But, in their basic, unmodified state, they produce a light that's pretty hard and not flattering. 

    So far, I've shown how you can make bounce cards and soft boxes that will take the edge off that harsh light and make your subject look better.

    Another device for doing this is the Lightsphere developed by Gary Fong. It's essentially a translucent plastic-and-silicone sphere that attaches to your flash and provides a diffused light for your subject.

    I remember seeing one in a picture of a press scrum at a Mitt Romney campaign event and joking that it looks like Mystery Science Theatre 3000's Tom Servo is a Romney supporter. 

    The concept is actually quite good, especially when you're in places where there isn't a white ceiling and/or wall to bounce a flash.

    But it comes with a $70 price tag, which can be a "hard nope" for some people.

    However, there's a way to get the same effect at a fraction of the price, and all it requires is a trip to the local department store for a few odds and ends. Specifically, you'll need a plastic drawer/shelf liner (not the self-adhesive kind) and velcro tape.

    As shown on Instructables, you cut a 15-by-6-inch piece out of the shelf liner, apply the velcro on the narrow ends of the piece on opposite sides and then you wrap it around your flash.

DIY Gary Fong Lightsphere

    It should look like this when you're done. (Photo credit: Arthur Gajewski, cc-by-sa)

    You'll notice it appears to be sideways on the flash, but that allows you to effectively use it whether you're holding the camera in a landscape or portrait orientation.

     So, how does it work?

    Allen Mowery did a Youtube video demonstrating. Check it out. I think I'll be adding one to my ever cramped camera bag.