Search This Blog

Showing posts with label DIY. Show all posts

Tuesday, July 5, 2022

Keep yourself hydrated, and your camera steady

    The tripod is usually considered the ultimate standard for keeping your camera steady.

    But there is a way to make it an even more rock-solid way to keep your camera from shaking: Hang extra weight from it.

    Many of the newer tripods have a hook on the bottom of the center column. It will either be permanently out or one that retracts inside the column when not in use, but the purpose is the same: To provide extra stability to the tripod.

     In an ideal situation — read in a studio or indoors with few people around — a tripod's three legs provide significant stability for a camera. But outside, there's wind and other things that can cause shaking or movement.

    Plus, if you have to raise the center column, that adds a measure of instability as you are putting a large amount of weight up high on a narrow column.

    The hook at the bottom fixes that, to a major degree.

    One of the things a weight at the bottom does is lowers the tripod's center of gravity. Instead of being top-heavy with a camera and lens at the top, there's more weight lower on the tripod, making it more stable.

    The extra weight also pulls down on the legs, further stabilizing the legs.

    Some photographers will hang sand bags from the hook to provide that stability, others use it for their camera bags.

    I was going to shoot fireworks on the Fourth of July, and with a slight wind I thought I might want to put some weight on my tripod to keep it still. But my camera bag weighs in more than the tripod's total weight capacity.

    Instead, I took my water bottle, which holds 24 ounces of liquid — about 1.5 pounds — and hung it on the hook with the carabiner I used to attach it to my camera bag when I travel.


    I could clip a second bottle on to it, giving additional weight and stability. And the carabiner's short enough to keep it from swinging wildly in the wind.

    In case you're wondering, here's one of the fireworks photos I took with the stabilized tripod.


    If you're looking for tips on how to shoot fireworks, Digital Photography School has some tips here.

Tuesday, June 21, 2022

Video can help when your motor drive isn't fast enough

    Back in the days when cameras would take only one picture when you pressed the shutter, you wound up missing a lot.

    It took time and good reflexes to capture a particular point in fast-moving action back in the film day. I remember going through more than a few takes trying to get a photo of a dart hitting a balloon for a photo class project on "hard and soft."

    While there were motor drives back then, three shots per second was the usual speed, which meant you'd burn through a 36-shot roll in 12 seconds.

    Today, even so-called "entry level" cameras can fire off six frames per second when in drive mode, and with memory cards that hold far more data than the computers that guided the Apollo Moon missions, you can shoot for a while.

    But sometimes that's even not fast enough, as Sony has now got some of its cameras operating with drive speeds of almost 50 frames per second — if you're willing to invest a couple thousands dollars just for the body alone.

    But if you want to get to that speed, there's a way to do it, even with a cell phone. Shoot a video instead.

    A couple caveats first: You're likely not going to get the full pixel count your sensor normally gives you since video is cropped to either a 720 or 1080 format. You might get closer if you're using a 4k video resolution.

    You'll also have an image that's in a 16:9 aspect ratio, but that's not a deal breaker. And you'll most likely be working with a jpg image, which hobbles some post-processing options you would have if you were shooting raw instead.

    But this is a cheap, effective way to get even higher motor-drive speeds than your camera can produce. Some cameras will let you shoot video at 60 frames per second (that's the speed that makes professional and college sports coverage on TV look crystal clear).

    I actually discovered this trick while shooting video of training a National Guard brigade was doing at the Yakima Training Center, a sprawling military installation in Central Washington*. One of the things I shot was a crew firing a howitzer.

    I wanted to send a picture to one of my sons, so I scrubbed through the video to find a picture of the smoke coming out of the gun's muzzle block. I found my frame and did a capture with the editing software I was using, and then processed the photo.

    It was at that point that I discovered I had something incredible. In the photo below, you can see the artillery shell coming out of the cloud of smoke at the end of the barrel.

    I doubt I would have got that if I were shooting stills with the drive running (for that camera) at its full speed of 6 fps.

    It's not something I would do every day, but if you have a situation where you need that extra bit of speed in the number of frames you're shooting to catch some fast-paced action, your camera's video function is a great tool to have in your box.

    (*The Yakima Training Center is where they also filmed the combat scenes in Audie Murphy's "To Hell and Back.")

Tuesday, June 7, 2022

Know your flash's guide number at a glance

    If you aren't using your flash in automatic mode, you're going to need to figure out things like aperture and power levels on your own.

    But first you need to know how much power your flash has, and for that you need the guide number.

    The guide number is a figure that shows you the flash's power, based on a formual of distance times aperture. The higher the number, the farther away a subject can be and still illuminated adequately.

    In the old days, we would have to do some math to figure out the aperture setting for a subject at a particular distance, or use a table on the back of the flash that would tell you what settings to use for a subject at varying distances.

   Today, if you want to use your flash manually, there are calculators you can use on your phone, such as the one in the Photographer's Companion, where you input a few variables, such as the guide number, flash power and either aperture or distance, and it will do the rest of the work to find the right camera settings.

   If you don't know the flash number, you can look it up in the flash manual, which you can also upload to your phone so you'll have it at all times.

    If you have just one flash, remembering the guide number is simple enough. But what if you use more than one flash, and they have different guide numbers.

    What I have done is made a label showing the guide number that I affix to the side of each flash unit, so I can tell with a quick glance what the guide number is when figuring either how far away to put the flash, or what aperture I'm going to need to get the right look.

    When I made my labels, I used a word processing program and set it for an inverted output, with white numbers on a black background, making the label look inconspicuous, even more than the old tables that used to be on flash units.


Tuesday, May 24, 2022

Turn household items into lighting modifiers

    Daniel Norton one of the photographers who appears regularly on Adorama's Youtube channel did a video during the COVID-19 lockdown demonstrating how to turn things around the house into lighting modifers.

    Among the items he uses to modify his single speed light are tin foil and poster board reflectors, as well as wine bottles and honey to create different effects.

    While he was doing it with a small figure on his desktop, the techniques could work for portraits.


Tuesday, May 10, 2022

DIY flash grid lets you put subject in spotlight

     We've talked earlier about softboxes, which allow you to make your light bigger and softer, which can be a flattering look.

    But there are times when you want the light to be tighter. For example, if you want to just do a rim light, you don't want to completely light up the subject.

    This is where grids come in. The grid creates a narrow spot of light with feathered edges so the light falls off. It does this by forcing the light through a grid, channeling it in one direction and reducing spread.

    Photographers use grids on all kinds of flashes, with some covering large softboxes, while others fit over basic speed lights. However, the smallest of those are $7 at some retailers.

    If you are looking to make your own, or make a custom set, you can do it for a few cents a piece.

    There's a couple videos out on Youtube showing how to make them, but the one I like is done by Spyros Heniadis. Instead of using straws to form the grid as some suggest, he recommends using corrugated plastic, also known as coroplast. What I like about it is you just assemble strips of material to a size that would cover your flash head. No need to glue individual straws together, assuming you can find black straws where you live.

    You can pick up coroplast at craft stores or sign shops, or just grab some campaign signs after the election, but you want to make sure the material is black. Other colors will cause a color cast, and white will spread the light out, defeating the entire reason you're doing this in the first place.


    One thing I did different was instead of using craft foam for the body of the grid, I used cardboard from postal mailing boxes that I used to make the softboxes, and then wrapped it in black duct tape to both hold it together and give it a more professional look.

    Here's a shot I took without the grid.
    

    And here's one with the grid.


    I used a 1-inch long grid, but you can use different lengths to either widen or narrow the field. With this method you can make a variety of grids for different situations.

Tuesday, April 26, 2022

How to get decent portraits with on-camera flash

     So you've decided to get a speed light to go with your camera, but you don't have a way to use it off-camera, or you don't have the space for a portrait.

    What do you do?

    Gavin Hoey, one of the photographers featured on Adorama's Youtube channel (disclaimer: I am not sponsored by Adorama, but its channel is a good resource) goes over some ways to get flattering light with a camera-mounted flash.

    (Note: This is for flash units mounted on the camera's hot shoe. If you're using a pop-up flash, these tips will not work for you, but check out the diffuser we featured earlier.)


What Hoey suggests is essentially bouncing the flash, preferably off a white or neutral-colored wall or ceiling. If you bounce off a colored wall, you're going to get a color cast.

    But what I found interesting was Hoey's suggestion for bouncing off a wall behind you if the room's small enough. Along with creating a softer light by bouncing it off a larger reflector, this over-the-shoulder move can also allow you to avoid the harsh look of a subject against a black background since the foreground/background light are now more balanced, thanks to to the inverse-square law.

    For those not familiar with this law of physics, light falls off at the inverse square of the distance from the light source. At 3 feet away from the light source, the light is 1/9 the brightness it would have at 1 foot. As you go farther out, the difference decreases, so you can actually get a more even lighting the farther back the light source.

    You do have to pay for that with either a wider aperture or a higher ISO.

     Another tip Hoey offered for overall studio photography is to first take a test shot with the settings you plan to use but no flash. The goal is to have the frame completely black, which means that the ambient lighting will not have any effect on the picture, and that all lighting will come from the flash. That can also be helpful if you're in a situation with mixed light sources. 

Tuesday, April 12, 2022

Power strips give you options when traveling


Photo by Kier In Sight on Unsplash 
 
     As the pandemic appears to be receding, we can start thinking about traveling.
 
    With more of our camera gear relying on batteries, whether it's a smartphone or a DSLR, we need to make sure we have chargers we can plug in. And let's not forget our computers.
 
    It's been my experience in my travels, that one thing hotel/motels skimp on in the rooms is power outlets. There usually aren't too many that are readily accessible, which was probably OK back in the pre-digital age, but it's more than a minor inconvenience today.
 
    And if, as I've done, you have to share a room with somebody, that can create a scramble for the available plugs or having to take turns charging your stuff. While cellphones can charge relatively quickly, battery charging for cameras can take hours, which can create friction with your roomie.
 
    Plus, if you have chargers scattered throughout the room, using plugs in the bathroom and other places, it becomes too easy to forget one and either have to buy a new one, or hope that the hotel staff will send it to you.
 
    (I had to have a hotel send me a shirt I forgot was hanging in the closet. I count myself lucky.)
 
    But there's a way to satisfy most of your electrical needs with just one outlet. Throw a power strip in with your luggage.
 
    A decent power strip will give you anywhere from three to five outlets, depending on the size of the strip. I would go for the largest strip you can afford to buy, as well as can easily pack in your luggage, as sometimes chargers can tie up two outlets.
 
    If you're traveling abroad to where the power system's different than in your country, you only need to buy one plug-in power converter. Just plug the strip into the converter, and you have outlets running with the same electricity you find at home.
 
    And if you're out in the field and you don't have the type of chargers you can plug into your car outlet, you can buy a power inverter that will convert the 12-volt DC current to regular AC electricity. Just make sure your inverter and power strip can handle the power demands.


Tuesday, March 29, 2022

Pencil boxes can bring order from chaos with your camera gear

    If you are taking your photography seriously, you're going to to be dealing with more gear than just your camera.

    Even if you manage to keep your Gear Acquisition Syndrome in check, you're going to wind up with stuff that you need to find a place for in your bag or studio.

    While camera bags do offer some ways to organize gear, such as dividers to create spots for lenses, cameras and other larger accessories, there are going to be smaller items that you just don't want rattling around loose in your bag.

    Sometimes there are tiny pockets you can use for some accessories such as lens cleaning cloths and memory card holders, but their space is limited, especially if you're packing extra batteries or other accessories.

    There's a solution you can find in the school-supply aisles of big-box, office supply or dollar stores that can help you put everything in its place and make your bag or studio a bit more orderly: Pencil boxes.

    These plastic boxes that are typically used for holding pencils, pens, chalk, erasers and similar classroom sundries can be used to store or carry gear. I use two to corral and organize my gear. 

    I use one box for the audio gear I use when shooting video (recorder, a couple plug-in lavaliere microphones, a USB charger and cable, patch cord and earbuds), and the other contains the batteries I need for my camera, flash and recorder, as well as a battery adapter so I can use AA penlight batteries in one of my DSLRs.

    I made labels for mine by typing up the names of the boxes' content category in a word-processing document and then used clear tape to put labels on each end of the box, so I know which one I'm grabbing regardless of how it got put back. If you have a label maker, either one that prints out the label on tape or the old fashioned ones that embossed each letter on a plastic tape, go for it.

    This setup ensures the stuff doesn't fall out of my bag, and provides some protection in the bag. It also creates a bit of a modular setup, allowing me to make it easier to better customize my gear load for a specific situation. For example, I do the online broadcast of our church services, so I just take my audio kit from my bag, taking just what I need and leaving the rest at home.

    The boxes can also be used to organize gear in your studio or storage space at home, avoiding a photographic junk drawer.


    The audio, left, and battery boxes inside my camera bag, sandwiching the case for my speedlight.


Tuesday, March 15, 2022

Get better portraits with DIY clamshell lighting setup

     One way to get good portrait lighting is to use "clamshell" lighting, and there's a way to do it without without triggering Gear Acquisition Syndrome.

    It's a lighting technique that can work with all sorts of portraits. What it does is uses a light source from above and one from below to light the subject. It's a relatively soft light and does not create harsh shadows.

    But you don't need an elaborate studio setup to pull it off, as Alastair Currill, an English photographer, demonstrates in this Youtube video. You can do it with one flash, a modifer to soften that light and a reflector to bounce the light back up to the subject.


    You can use a speedlight for the flash, and if you don't have an umbrella, you can use the DIY softbox and light stand we talked about earlier. As for the bottom light, you can use a table with a white cover or a foam board from the local big-box or dollar store.

    He also has another video demonstrating the principles behind clamshell lighting, albeit using more expensive studio gear.


Tuesday, March 1, 2022

Photographer's Companion a Swiss-Army-Knife app for serious shooters

    There are lots of apps on the market that can help with your photography.

    You can find apps that will turn your phone into a light meter, tell you when blue and golden hour are in your area and do a variety of functions.

    But if you have limited space on your phones (because companies will make it virtually impossible to delete some of the apps on your phone even if you'll never use them), you may find yourself picking and choosing which program to use.

    Or, you can just download one that can do most of the tasks you'll need.

    I would submit that the Photographer's Companion, available for both Android and iPhone, fits the bill nicely. Developed by Stef Software, it comes in free and paid versions, with the main difference being that the paid version has no ads and a few extra features.

    Personally, I've found the free version suits my needs, as most of the additional features in the paid version are things I wouldn't use or, in the case of flashlight and level, I already have on my phone or on my camera.


    For starters, this program gives you at the very minimum a reflected light meter. If your phone has a light sensor on it (this is usually used to adjust your screen brightness in relation to ambient light), you also get access to an incident light meter. This can come in handy when you're shooting manual or, as I did when I did a little photo project with my mother's old Argus C-3, the camera you're using doesn't have a light meter.

    You can also select your camera model or input the specifications, so it will be able to calculate things such as field of view and depth of field for your specific camera and lens combination. You can also use it to calculate proper flash settings, which is helpful in studio work or if you're using a non-dedicated flash on your camera.

    It can also show you when sunrise and sunset will occur in your area, as well as when to expect blue and golden hours, those times when light is at its most magical for photography. It can also show you the phase of the moon and the optimal exposure time for getting a picture of the moon or a moonlit scene.

    For those into astrophotography, it also uses the NPF rule for calculating the best exposure time to get no star trails.

    And each section has a help button that takes you to the website to get a tutorial on how to use that particular part of the app, as well as explain the principle behind it.

    This is not sponsored content, and I only use the free version, but I recommend it as a way to get some good high-quality photo apps without straining your phone's memory.

Tuesday, February 15, 2022

How to know the spare battery in your camera bag's at full power


 (Photo by John Cameron on Unsplash)

    Unless you're using your cellphone as your camera, batteries are going to be one of those accessories you'll need for your camera.

    It's usually a good idea to have more than one battery for your camera, as it gives you backup if you are out shooting for an extended period.

    But with multiple batteries you need to come up with a way to ensure that your batteries are fully charged. Trust me, there's nothing more frustrating than being out shooting and discovering that your spares are deader than Elvis.

    There are a few methods for doing this. One involves putting a little stick-on slider device on the battery, where the green side means the battery's good and the red side means the battery is due for a date with the charger.

    Those work fine if the battery clips to the outside of the camera or light body. My wife's camcorder batteries are mounted on the outside, so a setup like that would work just fine.

    But this doesn't work with the tight tolerances of an internal battery compartment.

    I've come up with a simple system, particularly after acquiring a second camera body and purchasing additional batteries for it.

    First, I've numbered each battery to ensure that they're all getting equal wear and tear, as well as knowing that the next number in sequence should have a full charge.

    Then, I added a rubber band to the battery and the plastic bag it sits in. If the battery's good to go, the band is wrapped around the bag. If the battery's spent, I put the rubber band in the bag with the battery, giving me an additional visual cue.

    I do something similar with the rechargeable AA batteries I use for my voice recorder and speedlight. If the batteries are wrapped with a rubber band, they're charged. If they're loose in their bag, then they're dead soldiers.

    What are your suggestions for tracking your batteries?

Tuesday, February 1, 2022

Need to RTFM? There's an app for that

    For a lot of people, the manual that comes with your camera or other equipment might be something you read once — if at all —and put it away.

    But with today's cameras being essentially computers with a lens, it doesn't hurt to keep the manual handy, especially when you need to remember how to use a feature that you've only operated occasionally.

    The obvious answer is to keep the camera manual in your bag, but that puts additional wear and tear on a cheaply made paperback. Heck, even the cover's paper, so it's not going to last too long in your bag.

    Or you might be like me, and there's no room in your bag for all the gear you carry.

    (For the record, I've never regretted having something in there and not using it. On the other hand, I've kicked myself plenty of times because I didn't have a piece of gear I realized I needed.)

    But there's a high tech way to carry the manual for every piece of kit you have without it taking up any additional room, or getting chewed to pieces in your bag.

    Every manufacturer has downloadable PDFs for their manuals on their websites. All you need to do is log in with your phone/tablet and download the file, where you can read it using a PDF reader on your phone.

    Personally, I also upload the books on to Play Books, Google's e-book reader, which can also handle PDFs. It allows me to access the books from my phone or any computer. You can do the same with the Books app on the iPhone.

    Since there's also a local copy on my phone, I can access the files on my phone even if there's no service.

    In addition to my camera manuals, I also have the instructions for my digital recorder and my speedlight on the virtual bookshelf.

Tuesday, January 18, 2022

Recycle film canister as DSLR pop-up flash diffuser.

    While the pop-up flash on many DSLRs are a way to get some extra light in a picture, it's not the best.

    These flashes, which take up the top part of the pentaprism, are typically tiny and work best at the range of 12 feet. It's also a hard light, which means a subject is going to have hard shadows around it and be harshly lit.

    I only use mine in situations where there's no other way to get the picture or as a wireless trigger for other flashes.

    But over on Instructables, user deth2all presents a way to take some of the harsh edge off the pop-up's light, and even add some color to it as well. And if you used to do a lot of film shooting with Fujifilm, or know someone who did, you can get the main part you're going to need.

   (deth2all/cc-by-sa)

    The diffuser consists of the plastic film canister that protected the film cartridge before use and later when sitting in your gadget bag. It has to be Fujifilm, which used a white, translucent plastic to make its cases; Kodak's canisters are all black.

    The project involves cutting away part of the canister's side wall, so it can fit over the flash head. He also cuts a slot in the side of the cap, which is glued back in. That slot is used to insert a colored gel for various effects, as well as balancing the flash with another light source.

    (He recommends getting sample packs of gels from art-supply stores, but those have since stopped providing them. You can make some of your own by cutting up colored plastic report covers.)

    The results he posted on the site show some reasonably good results. If you're looking to improve your flash photography but aren't ready to make the leap to speed lights, this is a good option.

Tuesday, January 4, 2022

Getting 360-degree panoramas with your cellphone with help from Google

    We've all seen those photos on Google Earth and Street View that show a 360-degree panorama of a subject.

    It gives you a chance to see an area as if you were actually there. When my wife and I were house-hunting after I had gone ahead for a job, we would use Street View to take virtual driving tours of neighborhoods where we were looking to buy, so we could both get a sense of the area.

    While Google uses a sophisticated camera mounted on a car, or backpack for trail views, and dedicated 360-degree cameras are in the triple digits, you can do it yourself inexpensively if you have a cellphone camera.

    If you use an Android (sorry, iPhone users), you can get a VPai Clip for your phone. The golf-ball-sized device, which I got online for less than $20, is not a camera as much as it is a pair of lenses for your cellphone. Each lens captures a 210-degree field of view.

    I know what you're thinking: That adds up to 420 degrees, and a full circle's only 360 degrees. Well, those additional 60 degrees allows the software you download on your phone to overlap and seamlessly stich the pictures together to create a 360-degree photo that you can see as a panorama, a sphere or a "little planet."

    If your phone's only capable of FHD video resolution, the image quality may not be the greatest and you'll have to upsize it to post it on Google Street view, but in the words of Krusty the Clown, it's not just good, it's good enough. Check out this one I did recently.

    But if you're using an iPhone, or don't want to get an attachment for your phone, Street View has you covered.

    The Google app has an option that allows you to use your camera's full resolution and optics to capture a photo sphere. It takes patience, a willingness to have people think you're a bit insane and a pair of steady hands.

    When you go to take a picture, the app will display a dot on the screen for you to line up on, and when you line up it takes the picture and moves the dot to the next spot. Eventually, you'll do a full 360-degree arc horizontally and vertically.

    If you do this, it's important to stay in one spot and turn in place, otherwise it won't quite line up as well, and you might miss spots, as I did in this one of the Alamo.

    Or this one in the torpedo room of the USS Blueback in Portland, Ore.

    But if things work out, you get a reasonably good shot, like this one:

    Let me know what you think, or if you try this, share links in the comments below.

Tuesday, December 21, 2021

Binoculars give your cellphone real telephoto

    For many people, cellphones are their cameras.

    On the one hand, most of us always have them with us, they're stupid simple to operate and, depending on your phone, can produce a decent picture.

    But they have a few drawbacks. The most obvious one is that most of them don't have an actual telephoto function.

    Most cellphone cameras give you the option to zoom in, but that is a digital zoom. Rather than actually magnifying the image as an optical zoom lens does, digital zooming merely crops the picture and then stretches that part of the image across the "canvas" of the image. That might be fine for a minor adjustment, but if you're really trying to see something far off, it is going to be a pixelated mess.

    Frankly, I consider digital zoom as one of the great frauds perpetrated upon consumers.

    But I saw someone suggest a way to get a relatively decent optical telephoto with a cellphone camera. It involves using binoculars.

    What you do is first focus your binoculars on the subject you're looking at, and then put the cellphone's camera lens against one of the eyepieces and take your picture.

    You get a picture that covers a small part of the sensor, but it's a true optical enlargement of the image. You can crop it and it still looks more decent than a digital zoom.

    Here's a few shots I did to test this.

This one is with the camera at its default focal length.


Now, we're looking through the binocular eyepiece and you can see the enlargement of the image.
 

Cropped to make it square.

    It's not the sharpest image, but it is better than what you would get with digital zoom.

    The biggest challenge is juggling the binocular and cellphone, especially if you can't rest the binoculars on a steady object, like a railing. And since you are using an extreme focal length in comparison to your sensor size (unless you're using a high-end cellphone, your sensor's going to be about as big as the fingernail on your pinkie), any minor movement in your hands is going to make it shake like a major earthquake.

    But it offers a way to get a close-up view. You can also use this technique on a telescope if you want to get a close-up picture of the Moon with your phone.


Tuesday, December 7, 2021

DIY hack lets you get Gary Fong-like lighting from your speed light

    Speed lights, or flashes as we used to call them, are great for getting lighting where it's needed.

    But, in their basic, unmodified state, they produce a light that's pretty hard and not flattering. 

    So far, I've shown how you can make bounce cards and soft boxes that will take the edge off that harsh light and make your subject look better.

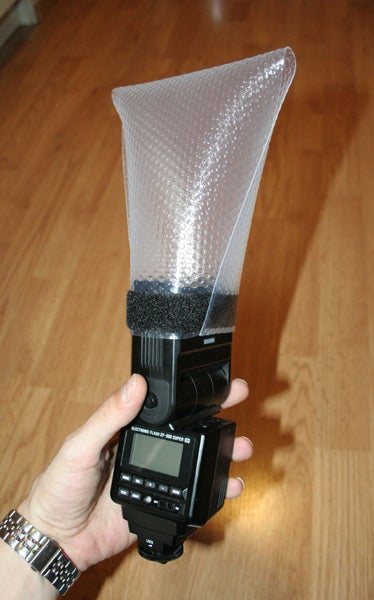
    Another device for doing this is the Lightsphere developed by Gary Fong. It's essentially a translucent plastic-and-silicone sphere that attaches to your flash and provides a diffused light for your subject.

    I remember seeing one in a picture of a press scrum at a Mitt Romney campaign event and joking that it looks like Mystery Science Theatre 3000's Tom Servo is a Romney supporter. 

    The concept is actually quite good, especially when you're in places where there isn't a white ceiling and/or wall to bounce a flash.

    But it comes with a $70 price tag, which can be a "hard nope" for some people.

    However, there's a way to get the same effect at a fraction of the price, and all it requires is a trip to the local department store for a few odds and ends. Specifically, you'll need a plastic drawer/shelf liner (not the self-adhesive kind) and velcro tape.

    As shown on Instructables, you cut a 15-by-6-inch piece out of the shelf liner, apply the velcro on the narrow ends of the piece on opposite sides and then you wrap it around your flash.

DIY Gary Fong Lightsphere

    It should look like this when you're done. (Photo credit: Arthur Gajewski, cc-by-sa)

    You'll notice it appears to be sideways on the flash, but that allows you to effectively use it whether you're holding the camera in a landscape or portrait orientation.

     So, how does it work?

    Allen Mowery did a Youtube video demonstrating. Check it out. I think I'll be adding one to my ever cramped camera bag.


Tuesday, November 23, 2021

Household photography hacks

    When he was the host on DigitalRev TV, Kai Wong did a video showing a few DIY photo hacks done mostly with items found around the house.

    Among the hacks he shows are filling a bag with popcorn kernels to use as a makeshift stabilizer, using a couple key rings and zip ties to hook a strap to your tripod and using an old nylon stocking as a soft-focus filter.

    Some of the hacks are worth trying out, although if you are going to do the Vaseline diffuser, I would probably get a cheap UV filter dedicated to that rather than trying to hold up a sheet of glass in front of your lens.

    Do any of these interest you? Or do you have a suggestion on household photo hacks?

Tuesday, November 9, 2021

How to turn a dishpan and cake dish into a monster DIY studio light

    If you are looking for a way to really light up what you are shooting, you might want to take a trip to the kitchen aisle of the local store.

    Griffin Hammond, of Indy Mogul fame, did this video showing his plans for a DIY studio light that had the output of the equivalent of 13 60-watt incandescent light bulbs. While the video is about nine years old, his idea is still a good one.

    His light uses a deep plastic dishpan for a reflector around the lights, which are in socket splitters in four light sockets, with the cake pan serving as the electrical box for the rig.

    Griffin's rig uses eight 100-watt-equivalent CFL bulbs, but LED bulbs should work just as well. He estimated the cost of the rig at $85, but it's not a bad price if you compare it to a commercial rig with similar output.

    You can also lower that price point by purchasing some of the supplies at your local dollar store instead of the big box stores. You'll probably still need to go to the hardware store for the lighting rigs.

    Griffin's rig requires some knowledge of electrical wiring, and his video doesn't clearly show the wiring pattern. If you'd rather not bother with making your own electrical circuits, some of the commenters on the video suggested using a power strip with plug-in light sockets, simplifying that part of the project.

    I would probably paint the outside of the pan black, giving it a better appearance as well as minimizing light spill.

    From his video, it looks like a great option if you're shooting video or prefer to use continuous lighting in your photo studio.


Tuesday, October 26, 2021

Getting close to eliminate reflections

    There are times when you want a reflection in you picture for artistic purposes, but there are more than a few times when it's a pain in the tuchus.

    This usually happens when what you're photographing is behind glass, such as in a display case, you're looking out a window or standing on top of the Space Needle in Seattle, where even on the outdoor deck you're behind glass.

    Some ways to get rid of the reflection, if it's ruining your composition, include changing your angle so the reflection isn't going straight into your camera lens (angle of incidence = angle of reflection) or using a polarizing filter.

    The only drawbacks with those methods is you might be limited in moving to the sides, and the light may be at the wrong angle for a polarizer, which works best when the light's coming from a right angle.

    While reflections can be eliminated in post (I had to do that with a picture I took of a stained glass window in a museum), that can be extra work you wouldn't need to do if you can eliminate the reflection before you trip the shutter.

    But Jefferson Graham, a writer/photographer/Youtuber, suggests getting right up against the glass.

    It's not a bad strategy, as you are blocking the light causing the reflection from your lens.

    (Do not try this tip with a museum display case. You may either knock over the display or set off an alarm.)

    The only thing I take issue with him on this matter is his suggestion that this option only works with phone cameras, as they typically have a flat lens. A DSLR, he argues, has a curved lens and can't be put in such contact.

    To which I call shenanigans.

    First, most of us use UV or skylight filters on the front of our lenses to protect them from damage, so we do have a "flat" surface to put against the glass.

    Second, a lens hood also provides the shading that can keep the stray light from messing up your photo. It works especially well if you have a collapsible rubber hood. Just make sure the hood is right for your focal length or you'll get vignetting.

    Another option to have a friend hold a jacket up behind you to block anything behind you from being reflected in the window. Just make sure they hold it in front of them, so you don't get their reflection in the window instead.


Tuesday, October 12, 2021

Get the U.S. Post Office to deliver softer light from your flash unit

    In our last post, we talked about using a modifier to bounce your flash and soften its light.

    If you're using your flash in an off-camera studio setup, you might want to use something a bit more heavy duty to soften that light from the flash.

    A flash is what's known as a "hard" light. It's a bright, small, directional light source that can produce a harsh light and crisp shadows, even if you use it off the camera.

    A softbox increases the size of the light source, which softens the light, especially when combined with a diffuser in the front. It creates a more pleasing effect, especially when you're doing portrait work.

    There are commercial options for speedlight-sized softboxes, but they start at about $17, and go up from there.

    But for the same price, you could make several soft boxes, varying the sizes based on the size of your flash and how much diffusion you want.


    This particular design is made from duct tape, aluminum foil, either wax paper or cooking parchment, and a post office shipping box.

    While this softbox is not collapsible, it is more for either in studio or if you're taking it to a staged location shot.

    While any cardboard will do to make the box, I chose to use a priority mail box for my build, inspired by my maker son who uses those boxes to make carrying cases for books. I found it's a good material for this type of project:

    • It is a more sturdy cardboard than you find with some other boxes.
    • The boxes are free at the post office. (You only pay when you actually ship something in it.)

    I figured out the size I wanted for the diffuser at the end, and then measured out on the cardboard from that width, angling the size lines down to the aperture where the flash unit goes, and cut the pieces.

 
    The next step is to put a reflective material on the inside part of the box, to increase the flash's power, especially since the light is going to be diffused. You can paint it white, but I chose to use aluminum foil, shiny side out. I used a glue stick to attack the foil, but I think in future builds I might go with a spray adhesive.


    I found that duct tape was the best way to join the sides together. I used black to give it a more finished look. For the diffuser panel, I used wax paper, but I also did a later one with cooking parchment, which has a greater diffusion but costs you one stop in light.
 
    It just slips over the front of the flash, and at this size works best when the flash is mounted on either a light stand or  a tripod, although you can scale it down to fit on a camera-mounted flash.

    So, what do the pictures look like? I thought you'd never ask.

    First, here's without the box.

    As you can see, the light appears harsh, and the shadow has a crisp appearance.

    Now, with the first box I built, which is about a 10x10.

    You can see the softening in the shadows, where there's now an actual penumbra rather than a hard edge.

    Here's a smaller version I made.

    This one didn't soften the light as much, as it was a smaller box, but it's also about 2 meters from the subject.

    Finally, I made a larger, shallower box, and used parchment instead of wax paper.


    This one produced a softer light, but I also had to increase the flash power by one stop to get the proper exposure with the parchment.